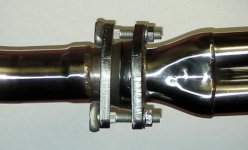
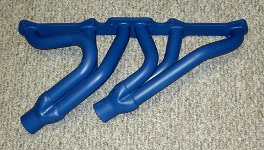
Here's a write-up on my install of the new Stainless headers and single exhaust (turbo muffler) system in my 63 drop top falcon.
As posted earlier the headers, themselves, are very well made and look great. I bought mine with the stainless coating and it was very smooth without any noticable imperfections. The front collector was slightly out of round which caused the down pipe to fit tight. Now for the install:
The headers didn't fit without some minor modifications. One of the bolt holes (bottom back) had to be ovalized toward the rear to fit the bolt enough so that the washer doesn't cover the front edge of the bolt hole - say 3/16" ovalizing required. The front collector hits the body where the stiffener for the lower arm projects into the engine bay. A few hard hammer strikes on the body cleared the collector enough so that I think it should be rattle free. The part of the collector that hits is the round buldge where one of the pipes mate to the collector. Stainless pipe doesn't bend easily at all so the 'adjustment' was only possible to the body. Next was the down pipe - it's either very, very close to the pitman arm or hits the inner tie rod when the wheels are turned 3/4 of the way to full lock. I had to flatten the pipe to clear both although the tie rod still hits at full lock. The y pipe didn't fit the two down pipes well at all. I think the difficulty was due to the front collector being out of round and possibly out of position a little as the pipes are too close together to easily fit. The way that the front pipe was bent would lead me to have the straight part of the y pipe near the frame rail but that caused another problem - the pipe would hit the floor support. There isn't enough clearance for the y pipe to fit that way so I had to reverse it with the straight part of the y on the inner down pipe (away from the frame rail). Obviously this causes the rest of the system not to fit correctly but with some good ol' yankee inginuity I got it to work. The y pipe is also too wide to fit the two down pipes without a LOT of force but it's on there. Well see if it cracks with the heat cycles. If it does, I can remove some material to get the y sections closer together. The front pipe dog leg was too big anyway and would have to have been cut. On a drop top the pipe has to go through the tunnel to go past the large floor bracing. After a few measurements, I cut the entire dog leg off and flipped the front pipe. There is just enough bend to clear the floor and braces. I will, however, have to use 1" spacers to drop the belly cross brace pan so that the pipe can fit as it hangs down slightly. The rear pipe fit almost the best. Using the stock hangers makes the cross over pipe hit the trunk. So a universal hanger lowered the pipe enough to clear it. With the "custom" front pipe, the rear pipe exit was off slightly and put the muffler against the gas tank. Luckily there were a few short offset bends included in the kit that allowed me to move the rear pipe to the passengers side to allow the muffler to fit. This puts the muffler farther back just shy of the rear frame cross brace but it fits. I used band clamps when there was enough room (no turns) to allow for any future adjustment if it rattles or bangs when going over bumps. I did talk to MIke and the system is apparently fit to a Mustang and not a round body falcon. Now that it's all in, it looks pretty good. We'll see how it sounds once I get the rest of the engine together for the break in run. That should be next week. In the end cut out over a foot of pipe - thankfully the system was too long as I don't have a pipe strecher... I'd rate this system better than a box of pipes and bends but it's not a bolt in kit. I'm not sure if a later model front end would help with the fit of the down pipe as I still have the old six cylinder front end.


