Converting to a Carter YF and Throttle Cable

Frankenstang

1K+
VIP
Subscriber
Here is a quick run down of my conversion to a Carter YF 1bbl and throttle cable....this one for David S. Thanks for all your Fordsix help!

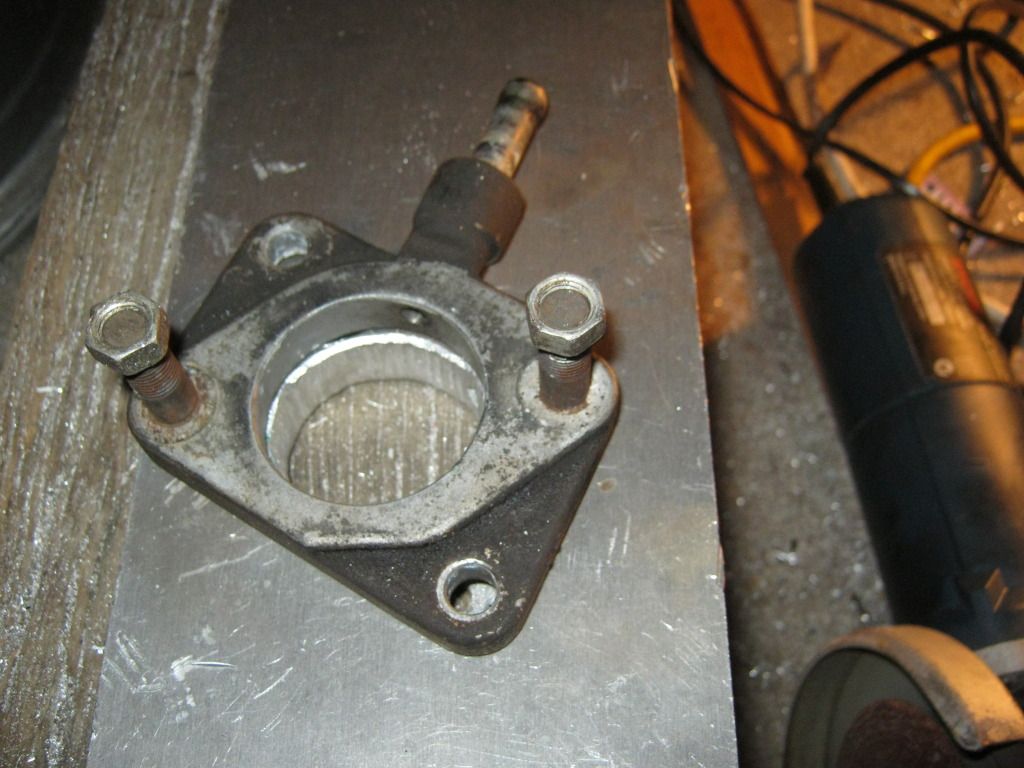
My Pony Vaporizer cracked right on the boss for the fuel inlet threads that receive the factory fuel filter (will try to post pic here later). Like the sign outside the mortuary (Halloween obligatory), it 'remains to be seen' if this crack in the upper air horn is repairable. Since the annular venturi of the Pony 1v is integral to that part of the carb, a substitution yields only a standard 1100.

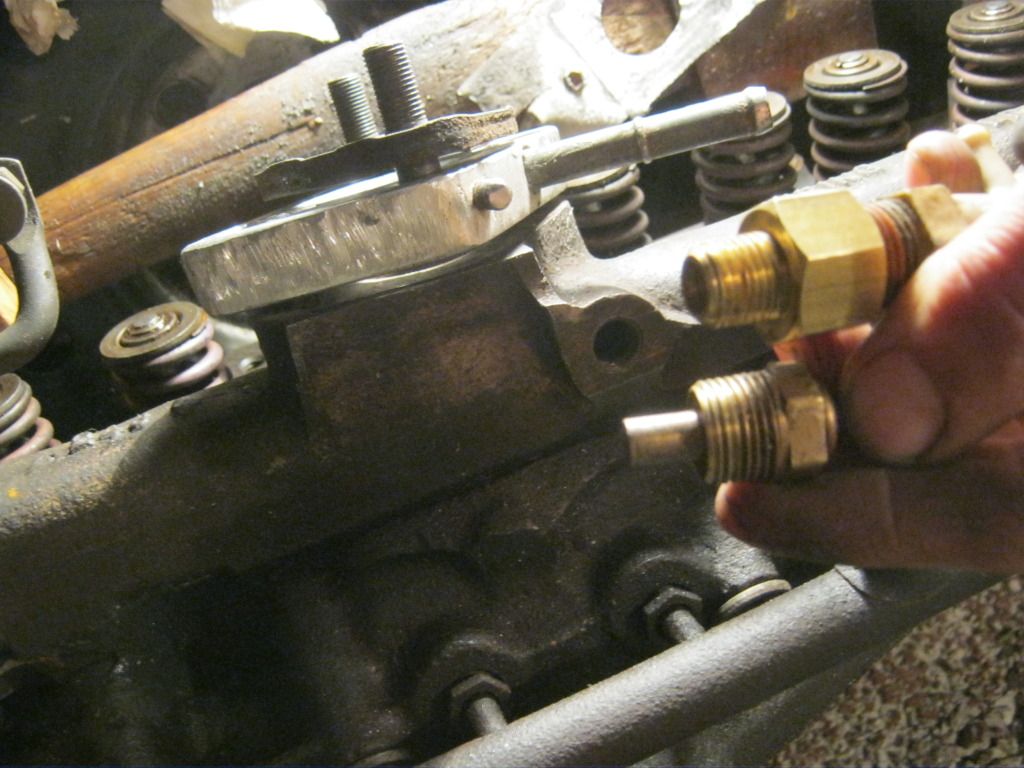
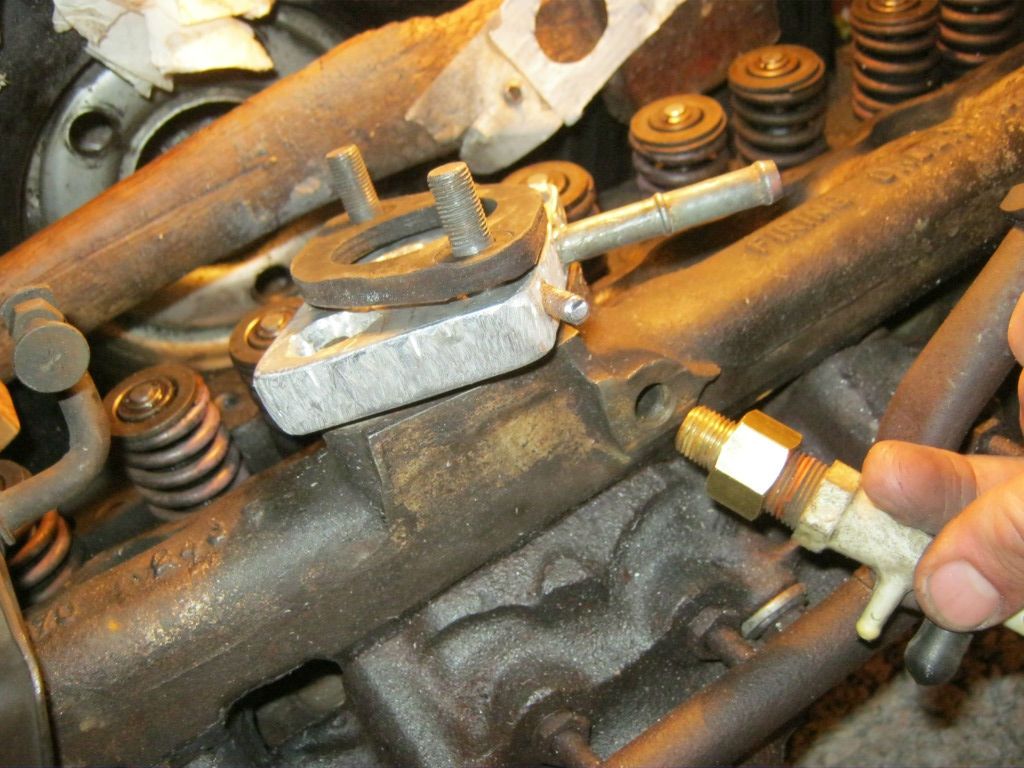
At any rate, thanks to the posts here on cable swap, I switched over to a Chinese 'knock-off' of the Carter YF. It's a new casting being imported by a few sources and available on fleabay for about $150.

Cons: Pretty much requires a switch to a throttle cable for smooth and full accelerator actuation. Only available in ~1.75" bore. Don't know for certain the CFM. Maintenance heave from what I have read, and lastly, a bit tall.

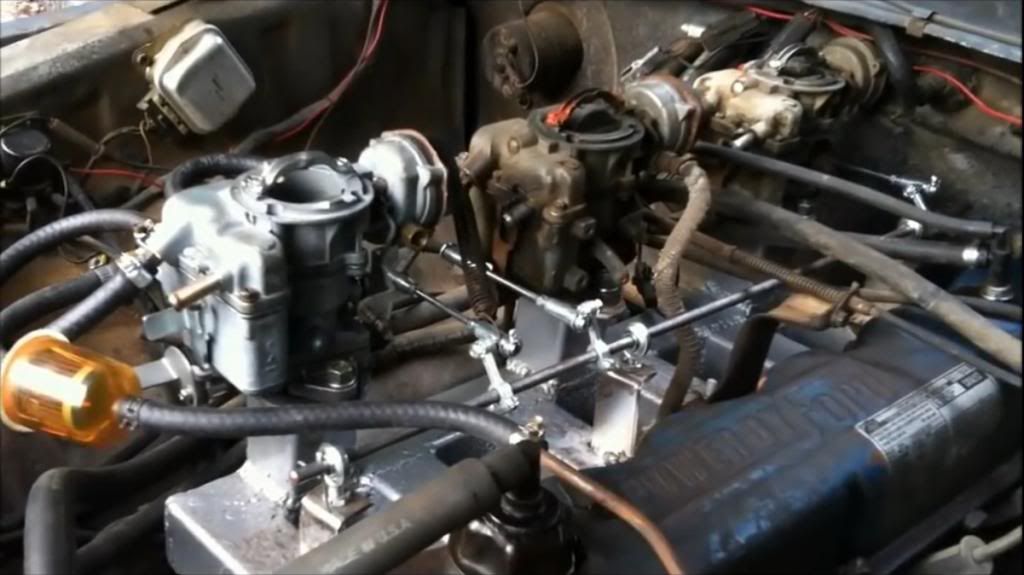
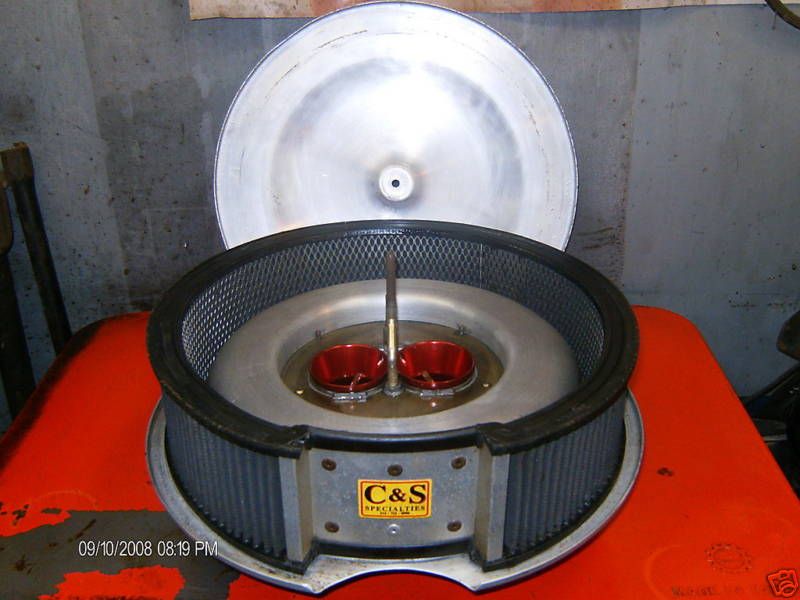
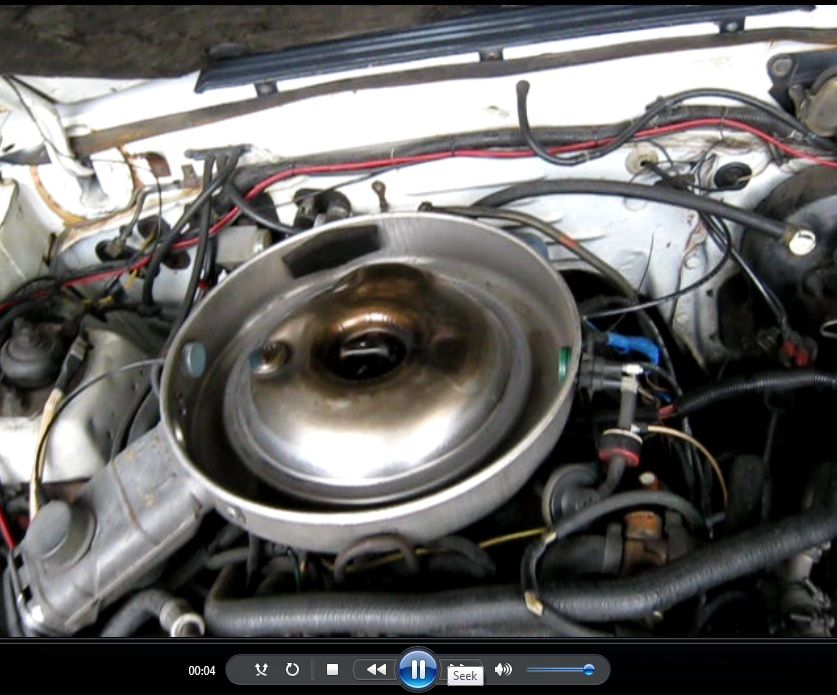
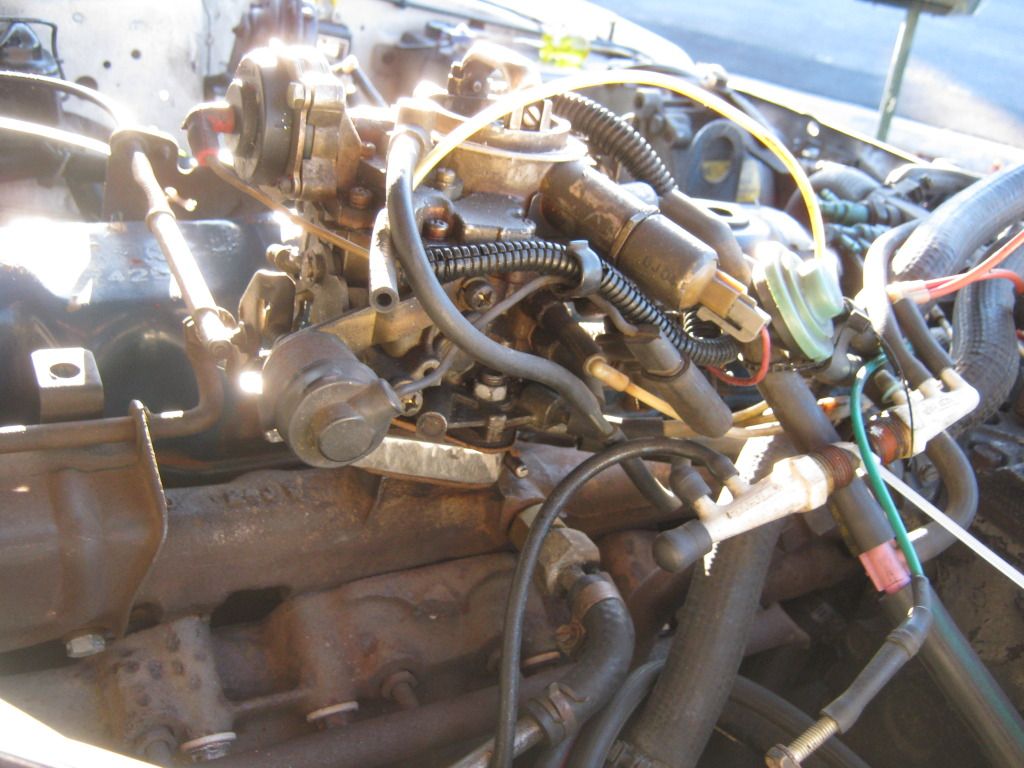
Pros: She runs decent right out of the box. Cold Idle/choked setting is too high, and warm idle curb setting is as well. Easily adjusted. Other than that I'm very surprised it is not overly rich or lean from initial driving and diagnosis. Now I just need a good cheap ('free'?) read on tuning the YF, and a super low profile filter setup to give it the real acid test. Not sure the stocker Mav/Granada/etc. type drop filter will cut it, and I still need to get some clay or some such and measure just how much room I have...but here's a couple pics so far...


'Required/Recommended' Mod - Cable Throttle: The cable pedal I just got lucky. A yard here in DFW had a Granada that had been there for less than a week and was completely picked clean, except for the pedal and throttle cable. Unfortunately for me it was a Bent8 so the cable came up too short (about 17" total). Purchased a cable for a 1980 Fairmont (again thanks to this forum...approx. 26" long), and I was in business after a quick white trash bracket fab. Also made use of a 3/4" piece of MDF to space the pedal mounting bracket far enough away from the firewall to give full actuation. I'm swapping that out for block of aluminum this weekend or next.

This was a reasonable mod with a $5 pedal assembly and $30 new cable plus the cost of the carb, but will stop short of saying a slam dunk win-win until I get it dialed in, the filter worked out and the first tank or two mpg readings.
Cheers and Good Luck!
 
Frankenstang":h62zwy6r said:


I'd say its a very good flowing carb. Its bigger than the old Autolite 1101 240 big six carb with its 1.29" venturi, and that could make 125 hp easily.


The earlier Carter RBS was rated at 215 cfm, not sure about the YFA, but its a good 120 hp net carb in those 4.9 trucks.


The YFA carb has a 1.4375" venturi verses the tiny 1.125" item the Tempo HSC 2300/ Fox 200/3.3 and Slant six 225/3.7 liter engines ran with till they got dropped in the early 80's. 85 to 91 hp max.

The little 1946 Holley 1-bbl in the 200 and 225 slant and its one year only US 1949 in the Ford Tempo 2.3 versions (including the 1985-1988 Canadain 6153 1-bbl version) was rated at about 202 cfm with that 1.125" venturi in the 3.7 liter Slant Six.


It uses the same late 70's Fox and F150 cable linkage technolgy that Colton Anderson ripped into when he made his triple Carter YFA 4.9 Big Six truck, I copied it and his rod operated intermediate shaft, and was able to use the stock C3 auto kickdown rod. The later cable is a great set up.


The YFA carbs are a good size too, like running a big single 45 mm SU carb.

Even nicer when there are three...

Nice work.
 
I loved the Carter YF on my mustang, it went from 94hp with the pony to 114 running the carter YF... the pony is really restrictive, I've calculated that it's roughly 167cfm pony and 220cfm Carter YF.

I even have a Dyno Post high lighting the results of the different runs, even with High ratio rockers the pony just doesn't have anything past 167cfm.

anyways, for my throttle linkage, I bent my arm and made a new 'connector' for the carter, sadly I bent the arm too much and when I MASHED the pedal to the floor I popped the linkage off the carb... never fixed it cause I eventually went 2bbl with a cable.

Just a heads up, that 1.75 bore I got a max of 127hp with a 2bbl carb and 2-1 adaptor, same 2bbl direct mounted and it pushed 135hp, and tunning on a separate dyno pushed it to 145hp.

anyways, keep up the good work!
 
Howdy Back Robert:

Looks great! I'll be waiting for more followup. I can't tell from the pix, is that a hot air choke system? Is the carb on an adapter between the carb and the manifold?

I'm told that the tuning issues are similar to tuning the Carter AFB 4v. When you find that out please share.

Thanks for posting your progress.

Adios, David
 
Thanks for the replies Dean, Richard and David!

It's interesting Dean recognized this as a YFA, as that seemed to be David's take as well.

Here's a link to The Old Car Manual Project site with some shop manual pages on the YF.
http://oldcarmanualproject.com/manuals/ ... /index.htm

Another couple links from Mike's Carburetors with some helpful youtube vids on rebuilding and bench setup of the YFA.

http://www.carburetor-blog.com/carter-y ... arburetor/
http://www.carburetor-blog.com/adjustin ... ering-rod/

It does appear to be the one commonly referred to as YFA rather than the older YF, and either a pre-'feedback' or 'non feedback' type.

David, yes that is the factory 'heated' spacer still on this C7 head (approx. 1" thick), and it's vexing my efforts to fit an air cleaner. Measurements from the top of the carb flange show I have right at 1.75" (or slightly over) to the hood.

It does have a 'hot air' choke. A choke stove 'Help' kit got the choke working as it should, but I think I'm going to have to delete the heated spacer base to allow enough clearance for an air cleaner or breather.

I've searched for the Maverick Granada type drop base air breather, but they are hard to find. So I found a small mutli-carb aftermarket 4" filter that has a 2 5/8" hole which fits snugly on the top flange.

My main concern now is, will orienting the carb counter clockwise 90* affect its operation much, as well as finding out if the throttle cable will still reach or will I have to revert back to manual linkage or some hyrid of the two :unsure::

I have seen a lower profile factory spacer that maintains the bowl forward orientation, but they are also hard to find, so I'm gonna try a direct mount for now so I can get a filter on top of it, until I find or fab a different spacer plate.

This will clock the choke tube and throttle linkage around to the passenger side of the engine and the bowl w/fuel inlet to the drivers side, as well as it will delete the pcv vacuum connection from the spacer so I'll move that over to the side of the log intake.
 
Howdy Robert:

Reorienting the carb 90 degrees is going to require a bunch of other adaptations to gain 1" of hood clearance. Given an additional inch of clearance, what options will that give you? or will that still be too tight? Would you do me another favor and measure the new YFA's height?

Did you want to retain the stock water heated adapter to aid carb heat?

What air cleaner did you have on the broken Pony carb?

Sorry, not any help today, but the solution is out there.

Adios, David
 
Hi David,

I'll hit these questions in kinda reverse order...

This YFA is 5 1/8" from base to top flange on the carb (flange for seating breather).

The Pony Vaporizer 1100 used the stock air breather. It's a 'sprint' chrome air filter about 2 1/2" tall, no snorkel and a smaller opening for the 1100.

I really don't mind losing the heated spacer except for the 'bunch of adaptions' it introduces...okay, not too many but a few...here's some pics to illustrate


So this actually turns the carb a little over 90*, and involves
Cons (more mods):
1) re-routing pvc to the plug on the side of the log
2) changing out the throttle cable from the '80 Ford stock one pictured to a Lokar or similar 36" cable...hopefully you can see from the pic that the stock cable cannot make another 90* to hook up with the throttle connection on the carb (the last 8 or so inches of the stock cable is a solid shaft).
3) kills my plan to bevel the opening in the 1" spacer out to 1.75" and allow a conical flow into the 1.5" throttle bore opening of this C7 head
4) requires a slight re-orientation of the fuel line, which is all flexible hose except for the 1/8" NPT barb fitting that deletes a typical 'thread in' factory filter (I use an inline filter).

There is a chance I could revert back to the factory pedal linkage, but the arm comes up a bit short the work the proper back arcing swing required for full throttle operation...I could lengthen the arm, but don't think bending would avoid possible binding issues...and not sure lengthening would completely resolve binding either...would be more trial and error.

Pros:
It increases clearance to 2 3/4" which will accommodate more air breather options, including a drop base or small diameter filter like those on multi-carb setups.

The other alternative is to leave the spacer, and fab or find an aftermarket breather that's no taller than 1.5" total...after visiting some parts places this morning...finding an after market option is not so easy to do. More likely this would involve using the offset base for the YF like Mike @ CI sells, or fabbing something similar. (note the high rise of the choke housing requires the offset or drop base design).

Decisions, decisions....I'm open to any and all suggestions, thanks!
 
Copy Ford engineering practice in two ways...

Firstly, the pich point is the air cleaner. Do the base modifications that Ford did on the X shell 250... the Maverick/Granada/Monarch with the L code (and, in 1980, the C code) 250 sixes.

Turning the carb won't help as muich as copying the 1974 to 1980 250 air cleaner base will..

They had a parbolic base with a high degree of curvature, and a huge drop down in the base.

The 2-bbl Big block guys copy this kind of base on there custom 2-bbl carbs.


The 3.3 Fox body was similar.


Then secondly, add a 0.5" alloy spacer so the carb can stay in the stock postion. I made one like this, which allowed me to mate the early 1.3" log head to my 1981 Mustang block. with the 1981 Holley 1946 carb. You are copying the late 1981 to 1983 adaptor to suit the early Ford small six stud pattern.


It has to be like an AK MIller 1101 Autolite conversion to the old 67 Mustang as decribed in Hopping up the Mustang Six.

Grab some 0.5" alloy.


Cut it down like this (use a little more finesse than I did though...).


And you dough is bread

 
One other member posted this. Its for an early Autolite 1100/Holley 1940 to later big log head with the bigger 2 5/8" stud pattern.

The idea for you is the get the stock early bolt spacing and the later Carter YFA or later Holley 1946 bolt pattern to gell together with as little height as you can...keep the carb orientation, so driling up a simple and thin lower adaptor will allow you to eliminate this intermediate item below.


smallsix1908to1946lateheadCarbspacerboltedtoadapter.jpg

smallsix1908to1946lateheadAdapterplate.jpg


The universal F100/F150 large bolt pattern change was facilitated by Ford with a nasty adaptor, they stayed with the concept to the bitter end, like on this 1981 Capri 3.3.

That resulted in extra height.

1981200exhaust01_original.jpg


Good fortune!


The second part is to devise the factory L, M and C code set up for cheap. These are three 250 engines.

78Granada250inbeige1968Mustang2007_05110002-1.jpg

75_250_120Small-1.jpg


Addos posts showed you how to reduce air cleaner height with the M code 170 HP 250.


2nd2V_Aircleaner_Stepdown_1.jpg


I'd grab a stock Fox air cleaner, cut in the inner part of the air cleaner to air filter margin, add a 25 mm 1 " steel ring to make the 250 M code version....that should give you enough room.
 
That resulted in extra height.

1981200exhaust01_original.jpg


Good fortune!

Many thanks for your reply and the great pics Dean. After studying on this yesterday evening, I was leaning towards a spacer fab and either a modified or stock 'drop base' filter assembly like the one you have pictured.

You have convinced me this is the best route. If I can keep the spacer within 3/8" to 1/2" height (sorry for the western centric measurements...like most here in the states I don't do metric well :rolflmao: ), and procure or modify a stock 'drop base' or parabolic shape with no more than 1.5" above the carb I should be in business.

That setup is cleaner, utilizes more of what I have on hand and minimizes the compounding mods 8)

Thanks again!
 
Howdy All:

Good plan Robert. X is just a bundle of good ideas with photo resources to match. Good on ya, Dean.

Keep us updated on your progress with both the thin adapter and the low profile air cleaner.

Adios, David
 
CZLN6":1amk82o6 said:
Good plan Robert. X is just a bundle of good ideas with photo resources to match. Good on ya, Dean.

No doubt David! xctasy's posts (like yours) are one of the reasons I joined this forum, and one of many as to why I keep coming back! (y)

Life is funny...

Spent better part of today, fabbing a 3/8" spacer from aluminum to gain 5/8" of what I considered valuable real estate, lol.

Used countersink bolts and standard studs for the mouting. A gratuitous shot or two of the weathered power plant...showing it's age, but she just won't die and give way to the long block sitting on a stand ;)


At the same time, I had a line on a mid 70's air breather on the 'bay, and the owner gets back to me that the carb opening is approximately 2 5/8" and the distance from the carb opening to the highest point of the lid is 1.25"...we have a winner! So as David had advised me previously...'be patient', not that it's my strong suit... :D


The spacer may be for naught, but it will give me a chance to run a carb with a heater hose delete that I believe only contributes to fuel boil here in Texas during the summer months...rationalization :unsure:: :rolflmao:

Conclusions, I think my measures are relatively accurate:

1.75" clearance from carb flange to touching the hood with a factory spacer

2 3/8" clearance to touch with the home spun modified 3/8" spacer

So the ca. mid 70's breather may have done the job all on it's own...remains to be seen. I'll post the fitment on that, when it arrives, as well as some updates on tuning and mpg's. If I do put back the factory spacer, it will still be with a heater hose delete (using a damaged spare), and a much better conical transition from ~1.75" to ~1.5" than what I ended up with in my quick fab today.

As always, many thanks to all the folks here on FSP, and Good luck!
 
Howdy Back All:

Good Job! The air cleaner looks like it has a relief bulge to clear the choke heater coil housing too. I think you're on your way. Such a better solution than canting the carb and jury rigging the linkage. Once you get it all cleaned up, there is still fine tuning to be done. I'm still curious about the richness of the internal idle circuitry. The rest can be fine tuned with a jet change and adjusting the needle valve.

By the way, what engine do you have on the stand? Long block? What head?

Thanks for the update and photos. Keep it coming.

Adios, David
 
Hi David,

I agree, and am very happy to have located what I believe is a YFA style cleaner based on initial info.
I'm also very pleased with the feel of the stock style cable pedal setup...smoother action than manual linkage. The 'canting' of the carb would have forced me to use a longer, aftermarket universal cable and introduced more curves in the cable which could have caused problems down the line.

The long block was a bit of a 'barn' find. It's a C6 block and C7 head, which is basically the same as what I have in the car, but it is bored .40 vs .30 over on the current one.

It appears to be an engine that was built almost 20 years ago, was painted and prepped for install...but never run. The cross hatching on the cylinder walls is still very distinct, and when I picked it up I made sure the crank turned freely. It was being stored down in Houston, so the more humid climate and age in storage is the likely cause of some flash rust on the unfinished parts. It was a bit of a gamble, but at $100 plus road trip to fetch it...I hoping it ends up being a good one. I mounted it on a stand, shot some oil in the cylinders and wrapped in a bag with some desiccates. Plan is to prep it for install this winter, and it will get the set of CI stainless headers I picked up second hand, but I remain a committed one barrel-er ;)


Howdy Back:

Good find on the long block. Just an FYI, it sounds like you've had the head off already. Did you check the chamber ccs? What was the condition of the 20 year old valve stem seals? What head gasket was used?

If you have to take the head apart to freshen seals and/or mill to maintain stock CR, consider having the carb hole drilled out to 1.75", along with back-cutting the intake valves.

While it's likely the head was milled during the rebuild it may not have been enough to compensate for a thicker than stock head gasket. The only reliable way to determine is to measure a chambers volume. In stock form a C7 head would have chamber volumes of 52 ccs + or - 1. this is probably another topic, so I'd better stick to the YF thread for now. Keep us posted on the conversion.

Adios, David
 
CZLN6":3kx7ez4i said:
Howdy Back:

Good find on the long block. Just an FYI, it sounds like you've had the head off already. Did you check the chamber ccs? What was the condition of the 20 year old valve stem seals? What head gasket was used?

If you have to take the head apart to freshen seals and/or mill to maintain stock CR, consider having the carb hole drilled out to 1.75", along with back-cutting the intake valves.

While it's likely the head was milled during the rebuild it may not have been enough to compensate for a thicker than stock head gasket. The only reliable way to determine is to measure a chambers volume. In stock form a C7 head would have chamber volumes of 52 ccs + or - 1. this is probably another topic, so I'd better stick to the YF thread for now. Keep us posted on the conversion.

Adios, David

Amen to all that. With the exception of the 1961-1972 170 cylinder heads, the C7 was officially (although not actually) the last of the common small chamber heads, and as such, they just require a few dollars on a complementary head skim to take off what a modern composite gasket looses over the old 22 tin FoMoCo, and a simple valve backcut, and every thou of increase in head port to 1-3/4" makes power, espacially if your staying 1-barrel. Incidently, the best info I have is that the Carter YFA venturi is only 22.5 thou bigger in the throat than the Autolite 1101 for the 240, at 1-5/16 venturi, 1-11/16 throttle and 220cfm at 3" Hg.


But mostly, :banghead: both David and Dean were just so disappointed that the C7 DE 6090 head you have on your 200 wasn't a C2 suffix item :cry:
NOOOOOOOO ITS NOT A C7 DE 6090 C2 AGGGRRHHHHHH!!!!!!!!!!!!!!!!!!!!!!!!!!!!!!!!!!!!!!!!!!!!!!

NOOOOOOOOITSNOTAC76090C2AGGGHHHHHH.jpg


You know, the one with rare as hens teeth split exhaust...

c7de6090c2headcode.jpg


I get so emotional baby...
 
xctasy":22k4t3cq said:
But mostly, both David and Dean were just so disappointed that the C7 DE 6090 head you have on your 200 wasn't a C2 suffix item
NOOOOOOOO ITS NOT A C7 DE 6090 C2 AGGGRRHHHHHH!!!!!!!!!!!!!!!!!!!!!!!!!!!!!!!!!!!!!!!!!!!!!!

I had no idea such an animal even existed, so my disappointment will be short lived ;)

David, I actually have not had the head off, but will start a new thread when I begin prepping the long block for install. I do plan to use new valve stem seals and a new Felpro head gasket (I've had good luck with those).

I will also plan on cc'ing the chambers, and look at shaving the head to compensate for the thicker Felpro gasket, as well as finding someone to back cut the valves and/or possibly 3 angle. Opening the throttle bore in the manifold to 1.75" would also be in order.

I wish I had mic'd the venturi while I had the carb off, but will try to update with those measures at some point. I'm intrigued that some of these were rated as high as 220cfm.

Looking at the Mike's Carburetor videos on youtube, it seems the metering rods are mainly in play on the accel pump circuit, and idle and main jet circuits are otherwise SOP :unsure::

I also plan to make use of the thermostatic warm air pre-heater on the snorkel and the fresh air pcv circulation using an oil filler cap with a hose nipple.

The air cleaner will arrive in the next few days, but for the time being I'm using a small 4" diameter, 2" high multi-carb style, open element cleaner (possibly restrictive due to its small size?). I will follow up with some updates on mpg's and plug reads after logging some mileage with the final setup.
Thanks again for all the tips, pics, suggestions and advice I've received here at FSP (y)
 
I'm a happy camper! The air cleaner just arrived, and the fit is pretty much perfect...hood clearance, choke clearance, etc. (y)

With the lid on the total height is below the tops of the shocks, and the diameter and location does not interfere with the hood ribs (hard to see in second pic, but the ribs on the '66 hood land just outside of the filter diameter).


The elbow barb brass fitting will be the new location for the pcv vacuum pick-up, and I'll flow fresh air to the valve cover via a push on cap with hose nipple. Also circled are the exhaust bolts/studs that will mount a fabbed heat collector and connection for pre-heater plenum to the snorkel (I'll have to come up with a hanging clamp-on type when I switch to a header).
The snorkel is short (about 6") and has the thermostatic snorkel butterfly with operating linkage, for warm air feed.


Next, is figuring out how the vacuum lines for the pre-heater (warm air delivery) plenum should connect...from what I can tell...
1) The vacuum from the carb goes thru this valve in the base of the breather (yellow circle), and it feeds a splitter mounted on the outer diameter of the cleaner which relays vacuum to the snorkel to open and close the flapper allowing warm air flow from an exhaust manifold riser

This is somewhat 'wild speculation' (or just an intuitive take), if anyone knows this to be the correct setup, or can correct my speculation :unsure:: :unsure:: ...it would be greatly appreciated!


I'm also not sure what role this piece plays :unsure:: It has two wires running to it, that are cut, in above pic.
 
Easy. Its an early electric switch, some basic thermatic valve. Not sure what for. None of my searching showed me what it was called, but certainly by 1985, none of the air cleaners had it.

http://www.ford-trucks.com/forums/70660 ... eaner.html

You'll remember our IMCO and Thermactor talk, and the 12 devices used, well, by 1981, carb Ford trucks went to a very disciplined 31 item system, yet the 80's stuff didn't have that electric sensor in that position.


Here's some simple acronyms and vacuum block off stratergies for the YFA carb

http://www.ford-trucks.com/forums/77996 ... onyms.html
http://www.ford-trucks.com/forums/96724 ... tions.html
http://www.ford-trucks.com/forums/11469 ... s-etc.html

FYI. Most in line sixes didn't get manadatory air pumps till after 1978, and even then, some didn't require it untill 1982.

For some CA or high altitude areas, with the dirtier manual transmission vehicles, there needed to be an air pump to scrub up the hydrocrabons on over run or for cold starting (you can't fast idle a manual trans engine the same asn an automatic), so an automatic on/off control (via Thermactor diverter valve) was on the outside. That's what the round plastic outer thing is. When required, all 250's ran the air pump on the same side as the 300's when equiped.

Most later PCV valves were outside the air cleaner from either the front or rear hole in the rocker cover...after 1978, hood room restrictions forced Ford to move the oil filler right back to the rear of the rocker cover.
 
xctasy":3seq98h6 said:
You'll remember our IMCO and Thermactor talk, and the 12 devices used, well, by 1981, carb Ford trucks went to a very disciplined 31 item system

Lol, 'disciplined 31 item'...yes, I remember the IMCO vs Thermactor discussion, and the early versions, while being only a bit complex, can't hold a candle to the stupefying schematics of the 80's :shock:

Thanks for the links xctasy, they help make some sense of those later systems.

I couldn't find a good Ford diagram, but here is what I believe is a bowtie version of the pre-heater system, lifted from AutoZone's site...


My hope is to make use of this subset of the thermactor system to help engine warm up and minimize choke and improve efficiency. I still need to test the bellows in the snorkel and then see if I can use the vac source at the base of the carb to feed the thermostatic valve in the base of the air cleaner (if I'm following the info from ford-trucks correctly). I plan to leave the large choke, fresh air circ vacuum line up top plugged.


xctasy":3seq98h6 said:
(via Thermactor diverter valve) was on the outside. That's what the round plastic outer thing is.

However, if 'the round plastic thing' on the side of the breather is another functioning valve...that could complicate things :unsure:


Glad to see the site back up (y)
 
Back
Top