59 F-100 / 223 six...my project

59F100

Well-known member
Hey Everybody...I like following other builds so much, I figured I would start my own.

I have a 59F100 with a worn 223cid, 1bbl, LOM distributor, 3-spd standard on the column, and a 3.73 rearend that needs rebuilding.

I got the truck with a "hardly running" engine that had "no pwer". This was very true...I found loose valve train bolts, loose rockers, no vacuum signal to the "load-o-matic" (LOM) distributor advance, oil soaked and carbon fouled plugs, and leaky exhaust and intake gaskets...and thats about all....

I fixed all of these problems and the truck started with ease even on very cold days and ran very smooth and very quiet...however, it still had no power...it bogged severely with any type of load (common problem from what I have researched). I left off last spring (before I was deployed) rebuilding the carb which was ABSOLUTELY FILTHY inside and trying to piece together the stock throttle linkage with parts from one of our members here (my original parts were missing when I bought the truck).

I have a four week vacation coming in November and have been trying to mastermind a plan to get the most out of my time and stick on a budget at the same time. Here is my plan.... :unsure:
 
:arrow: finish installation of carb/throttle linkage, drain gas tank and replace all rubber fuel lines, clean plugs, prime with new gas and hope that I fixed my bog problem...if not, I tow it (back to my house).

:arrow: put truck up on four jack stands...pull rear-end and haul off for re-build (seals, bearings, re-assembly)

:arrow: pull radiator and haul off for re-core or repair (assessment and price may steer me to a replacement...)

:arrow: pull engine and disassemble for inspection....send cam/lifters off for re-grind (custom grind for max low RPM torque

depending on the condition of the engine...
:arrow: clean, hone, new bearings, new rings, new oil pump, and new water pump, new gaskets....OR
:arrow: send to machine shop for .030-.040 overbore and some new flat top pistons...

Same deal on the head.....
:arrow: if it checks out okay and I have good seating...clean and re-assemble with new rocker adjustors (adjusters?)...ELSE
:arrow: off to the machine shop for a shave and a valve job.

:unsure:
 
In between waiting on parts and labor, or just for a change of pace....I have the following:
:arrow: rebuild front end (havent really looked into this too much yet)
:arrow: clean, prime, paint engine bay, install new battery box with hold down
:arrow: replace all brake cylinders, brake lines, shoes (as req), rebuild master cylinder
:arrow: rebuild horn button on steering column
:arrow: repair turn signal s and running lights (wiring issue)
:arrow: troubleshoot gas guage, trouble shoot wipers, trouble shoot fan blower motor,...
:arrow: bolt down seat to floor, install seat belts, install ignition bezel, etc...

:unsure:....I think that's it ! ....four weeks... :shock:

Stay tuned if you like. If one person gets something useful out of this adventure then it'll be worth it. Thoughts and opinions are welcome.

Regards,
-Kevin
 
You might consider installing disk brakes on the front along with a dual Master Cylinder(with Proportioning Valve). Won't be too much more than just going through the brakes as you planned and will be a significant safety upgrade.

Fred
 
no vacuum signal to the "load-o-matic" (LOM) distributor advance

You said you fixed it? :shock: the LOD is not supose to have vac. to it :unsure: it is suposed to be a vet. vac. and is controled by the SCV on the carb :shock: This is prob. why you are getting the bog. :nod: Rest of your build plan looks good (y)

 
bubba22349":q2c8859y said:
no vacuum signal to the "load-o-matic" (LOM) distributor advance

You said you fixed it? :shock: the LOD is not supose to have vac. to it :unsure: it is suposed to be a vet. vac. and is controled by the SCV on the carb :shock: This is prob. why you are getting the bog. :nod: Rest of your build plan looks good (y)
See this thread. It shows the (then) un-connected vacuum port on my Holley 1904 with SCV. The port shown in the photo is where I re-connected my LOM distributor restoring the timing advance. Not sure if it is working "correctly" but it does make my timing move when I gun the motor. I dont know how to really test it for proper operation under a load.

viewtopic.php?f=18&t=54307

(if the link doesnt work, let me know).
 
Okay that would be the right way to hook it up (y)
Did you ever do the compression test back then and if so what were the readings? The oil fouled plugs are not a good sign :unsure:
 
I did a compression check but the gauge I had was not very reliable...I have a brand new gauge at the house. I'll re-do the readings when I return and post them here.
 
:D Hey everyone, I know you were thinking that this thread was going to start collecting (more) dust but I have not forgotten it. I'll be home in just a few days to start executing the plans I laid out previously.
So I left off with a freshly rebuilt single barrel carb in an attempt to cure a severe bog on my 223cid inline 6. The carb is a bone dry rebuild sitting right where I left it (atop the engine) 8 months ago. The first order of business, lest I gunk up my "new" carb, will be to drain and flush the tank, replace the fuel lines and filter, and refill with fresh gas. Seems simple enough, and my hopes are high considering how the carb looked when it was disassembled...we'll see how it goes.

If it runs well enough (or not), I drive (or tow) it to my house where the real fun begins :unsure: .

First order of business will be engine disassembly/inspection and cam re-grind. Please stay tuned.
 
:unsure: Well...finally got back in the country after many months and got my hands on the truck yesterday.

I drained and removed the gas tank and found a huge amount of sediment and crud inside. The gas was dark brown and smelled very bad. I removed the sending unit and found that the float was gone and the arm was rusted almost completely off. So with that, I removed all of the gas lines, fuel filter, and the fuel pump so I can make everything fresh and clean again.

I brought the gas tank to a radiator shop for boiling/cleaning/sealing and they said it will be about a week before I get it back. So today I will remove the radiator and bring it to the same shop for repair or re-core.

In the mean time I will see about getting a fuel pump rebuild kit, fuel sending unit, and several other odds and ends that this truck needs. Looks like I wont be starting the engine for at least a week so I have a little time. :unsure:
 
Soon you will be able to see if it will run well enough to drive (y)
 
I started poking around under the dash today, removing unused/aftermarket wires, observing the horrible wire splices installed over the years, melted insulation, etc...I'll continue to focus on the under dash wiring tomorrow. My aim is to run through the entire electrical system before I even connect my new battery. Most problems can be found and fixed without applying any power to the system by doing simple visual inspection and continuity checks.

While I was under the dash, I also pulled out the left and right side vent cables, the heater/blower motor cable, and the heater/blower motor assembly. These will all will be cleaned, lubed, and checked for serviceability prior to re-installation. The flapper doors on the floor vents seem to be in good shape thankfully however it appears that a rodent has stored a considerable amount of "nest material" in my air vents/ducts and when I say "nest material" that includes my "bench seat" stuffing :| . So I cleared out the debris just behind the flapper doors, but the duct running from the cowl intake (top center of firewall) over to the floor vents is also full of material and I cannot get my arm up in there (plus it creeps me out reaching up in there). That is another job for tomorrow.

Looks like I'll have to get the pictures loaded to my photobucket account before I can show them here? More to follow...

On a side note, I am trying to find a source for the defrost duct vents. I dont see them at LMC, Dennis Carpenter, or Classic Auto (Obsolete Ford Parts). If anyone has a source, I would appreciate a lead. This is the part that the defrost hose connects to, and that also attaches directly to the underside of the dash. Looks like the head of a vacuum cleaner.
 
NOTE: I apologize for the pictures. It appears that the link takes you to photobucket instead of opening the picture here in the forum so you will have to hit your browser BACK button after viewing until I figure out how to better post them. :unsure:

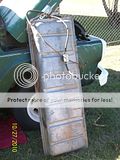
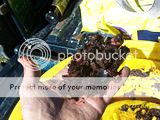
Some pictures of my gas tank and it's contents...if you vehicle has been sitting a while, or is just plain old, this is a good reason to drain and flush your tank :|


Driver's side floor vent (passenger side vent also had that "lived in" look)...

Closed:


Open:


Home sweet home...
 
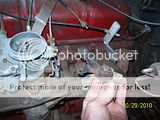
I am having some issues with the linkage I aquired from a member here...not quite sure what I am missing but it does not go together quite right...This is something I need to figure out prior to starting the engine or else I will have to temporarily cobble together the cables and bracket that was "rigged" in there before.


Just quick update and a follow up on my earlier questions...any suggestions are appreciated.

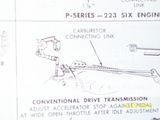
-If anyone could post a picture of their throttle linkage (223cid, 1bbl) as a reference for me, that would be cool.
-If anyone knows where I could source the defrost duct vents (not the hose) that attach under the dash, that would be great as well.


Upon further review, I decided to replace the wiring harness in my truck. I picked one up from Classic Auto Parts in Oklahoma City (local to me) and it was money well spent. It is an exact duplicate of the original and terminated with all the correct plugs and sockets which make it very easy to replace. Should be finished with that today sometime...

-Cheers :beer:
 
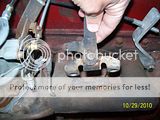
On your throttle linkage- the piece you're holding in your hand is the pivot piece that mounts to the head/manifold (It's late, and I don't remember which one it mounts to). On mine it's also a part of the pcv mounting, kinda. That pivot piece has a rod attached (horizontal) on one end that goes to the gas pedal linkage, where it comes through the firewall. The other side of the pivot piece has a short rod (vert)that goes to the carb. The short rod is a slightly weird double-jointed piece because of the articulation of the carb butterfly linkage isn't in a straight line, sorta. Imagine a cheaply made heim joint set-up. I know that probably sounds confusing, but it's not very complicated I just have a habit of making it sound that way :mrgreen:

The cable set-up somebody installed looks like it replaces the linkage from the pedal to the carb (?). How does it mount to the carb body/throttle? That all needs to come off to make the stock linkage work.

I'll try to shoot a couple of pics of mine tomorrow to better explain what I'm babbling about.
 
I shot a few pics, but don't have a photobucket acct anymore, so I can't post them here. I'd be happy to forward them to you, if you still want a visual of a running set-up.
 
Back
Top