
You are using an out of date browser. It may not display this or other websites correctly.
You should upgrade or use an alternative browser.
You should upgrade or use an alternative browser.
My Budget 250 build
- Thread starter lavron
- Start date
lavron
Well-known member
JT81stang":17r00e0p said:Mike, I noticed in the video that you have the air inlet on the oil cap plugged.
Should it not be open?
There has to be incoming air for the PCV to work properly and also to have neutral pressure inside the crankcase.
It has a piece of mesh cable cover over it to keep out dirt dobber wasps mostly, they like building mud nests in everything, it does allow air in.
pmuller9":17r00e0p said:Capacitive discharge is better suited for low rpm work especially since MSD provides multiple sparks for most of the operation rpm range of the Ford six.
Thanks for the information, but right now those are a bit over my budget possibly a future upgrade so I will have to deal with the HEI modules for now.
See Ya,
Mike
lavron
Well-known member
So YouTube decided to make me struggle to get this video up, after 2 1/2 tries I finally got it uploaded.
I have successfully eliminated the worse of the rattles related to the engine, pretty happy right now.
64 Comet 250 Update - Fixing Rattles
Talk a little about casting the custom intake and show a few things I have done lately besides making taillight sequencers
See Ya,
Mike
I have successfully eliminated the worse of the rattles related to the engine, pretty happy right now.
64 Comet 250 Update - Fixing Rattles
Talk a little about casting the custom intake and show a few things I have done lately besides making taillight sequencers
See Ya,
Mike
lavron
Well-known member
Made a quick video of the 250 cold starting today and thought I would share it for anyone interested in such things
'64 Comet 250 Cold Start 2
Can't wait to drive it (on pavement anyway)
See Ya,
Mike
'64 Comet 250 Cold Start 2
Can't wait to drive it (on pavement anyway)
See Ya,
Mike
lavron
Well-known member
I think while the site was down I made another video I was going to share with you guys but couldn't get on, maybe it has some helpful information for someone down the line, it has to do with it a slow-rolling starter, which turned out to be a couple of bad connections.
'64 Comet 250 Slow Starter Fixed
I know most guys would know about this issue but I guess I shouldn't assume anything I even asked for advice to clear it up.
See Ya,
Mike
'64 Comet 250 Slow Starter Fixed
I know most guys would know about this issue but I guess I shouldn't assume anything I even asked for advice to clear it up.
See Ya,
Mike
lavron
Well-known member
Finally getting started on the custom cast intake again, just got the two pattern halves mounted on a board so far, but this part should move along fairly quickly, not so sure on the flask construction that may take a little longer just because I will have to get some supplies.

When I get this cleaned up and the gates and sprues added I will paint it all with some glossy paint to seal it up. My major task on this project is coming up with 75# - 100# of green sand, I have no idea where to get that around here (I did see a video about making it out of pool sand and kitty litter I may try).
I also made a quick fun video of me pulling the Comet into the shed after I finished up this afternoon, it is a quick one about 1 1/2 minutes. I did almost flood it but that is because the e-brake doesn't hold it and I was trying to hold the brake and run the gas with the same foot and I didn't do too well, I did give one more tug on the brake lever and it held it so I could get it started.
Parking the '64 Comet for the night
See Ya,
Mike
Sounds good Mike, since it’s getting colder you could try setting the chokes fast idle to 1500 RPM with it on index mark the upside down V. 
lavron
Well-known member
Well that was the wrong video posted up there :roll: was supposed to be this;
Parking the Comet
Thanks Bubba, I think I may have backed it off the other day so I will look at increasing the fast idle.
See Ya,
Mike
:roll: was supposed to be this;Parking the Comet
bubba22349":3ofjuvkw said:Sounds good Mike, since it’s getting colder you could try setting the chokes fast idle to 1500 RPM with it on the mark the upside down V.
Thanks Bubba, I think I may have backed it off the other day so I will look at increasing the fast idle.
See Ya,
Mike
saw ya (commented?) on the vid(s).
Lota fun there, here too.
As U no, been waitin for this. Did some of it in the 70s (artist forge).
I don't think we used green sand. Here's a 2nd material. I'm betting we
used a 3rd:
We are using Petrobond, a so-called "oil bond sand" that is made from fine silica sand, clay, and mineral oil. The clay, wetted with oil, acts as a binder and gives the sand strength once it is compacted. The alternative to oil bonded sands are "green sands", which are formed from sand, clay, water, wood flour, and a few other ingredients. Oil sands are stronger, require less maintenance, and are generally easier to use, but are more expensive, and require petroleum products. Green sands are cheaper, and can be made DIY, but they require more maintenance, since the water will evaporate out.
If interested I'll get more info
lavron
Well-known member
chad":amqnssyo said:Green sands are cheaper, and can be made DIY, but they require more maintenance, since the water will evaporate out.
If interested I'll get more info
Any info on DIY greensand I am interested in because that is probably what I will do, unless something happens I will most likely only cast these and nothing else for a long while.
IIRC, the guy I saw making it was using an old blender to grind up the cheap clay-based kitty litter and screening it as well, I would need to come up with a recipe for sure.
The only other thing I would like to try and cast are dash/console trim parts and I would probably do those lost wax.
See Ya,
Mike
"...lost wax..."
w/ or w/o a 'spin' (centrifuge). We used both for jewelry.
The way U described ur method (I call '2 haves') is kinda the opposite of my most used technique (more like lost wax) as sandy/
cemetiouse media was packed around the "lost" object. I had hinged metal flats about 4 inches hi by a 2 x 4 ft rectangle, some sand put down inside a flat, nother flat stacked, filled w/sand, etc. After a few, an object was placed inside the dimension of the flat. Continue w/sand and flats so as to bury the object. Take more burnable objects to make funnels. They allow the molten metal to be poured in, the hot explosive gasses to escape w/o damaging the form. Lot more to it but thats the 6 sentence description. Come back when cool. Take apart flats, removing sand as U go. Treat 'object' as you wish (smooth and rough grinding, paint, etc.
"...green sand..."
All I'd do is puter searches.
(yup this one is 'kitty litter'
https://www.google.com/search?client=sa ... fk_bqYDQ12
I used bentonite clay on my baby's (24 y/o now) butt for dyper rash...
lavron
Well-known member
Working on the intake again today and decided it needed some ribs because it is a rule that aluminum speed parts always have ribs :roll:

I brought it in the house for the night so the epoxy won't take forever to cure, then I can get it cleaned up and smoothed out.
Ok, so it took a while to execute those but I guess it will be worth it
See Ya,
Mike
I brought it in the house for the night so the epoxy won't take forever to cure, then I can get it cleaned up and smoothed out.
Ok, so it took a while to execute those but I guess it will be worth it
See Ya,
Mike
lavron
Well-known member
Thanks for the encouragement guys.
If you would like you can ride along with me as I go pick up my mail out of the box, I am testing out my new camera and trying to shake stuff off the Comet :roll:
64 Comet Mail Run aka trying to shake loose stuff off the car
Someday I will make it on to the highway.
See Ya,
Mike
If you would like you can ride along with me as I go pick up my mail out of the box, I am testing out my new camera and trying to shake stuff off the Comet :roll:
64 Comet Mail Run aka trying to shake loose stuff off the car
Someday I will make it on to the highway.
See Ya,
Mike
lavron
Well-known member
65coupei6":1ax3mh8n said:Nice ride. The car came along nicely.
Thanks Marco, at times I never thought I would get to this point, but sometimes you have to stop planning and start turning wrenches or start chopping and welding as the case may be.
65coupei6":1ax3mh8n said:I am glad I just have to walk down my stairs to go to the mailbox.
A lot more fun driving to get the mail
when I am feeling ambitious I sometimes walk down and get the mail, it is ok going but coming back is rough I have always loved this car, but I am really loving it now even with it unfinished, it pulls so well, feel strong, hopefully when the triple carbs go on I will like it even more
I don't consider myself super talented in any way when it comes to this type of stuff and this is the first time I have ever done anything even remotely as involved as this, so I am amazed at how well it has turned out so far being built in my shed with crude tools (mostly an angle grinder and a HF welder), scrap metal and junkyard parts, and a lot of help from friends and strangers on the internet.
Worked more on the intake pattern today but nothing worth showing yet.
See Ya,
Mike
lavron
Well-known member
Continuing on the intake pattern, I added a basin(?) and some sprues/gates to it today. I went ahead with putting the top on the bottom of the pour, so it will pour upside down.
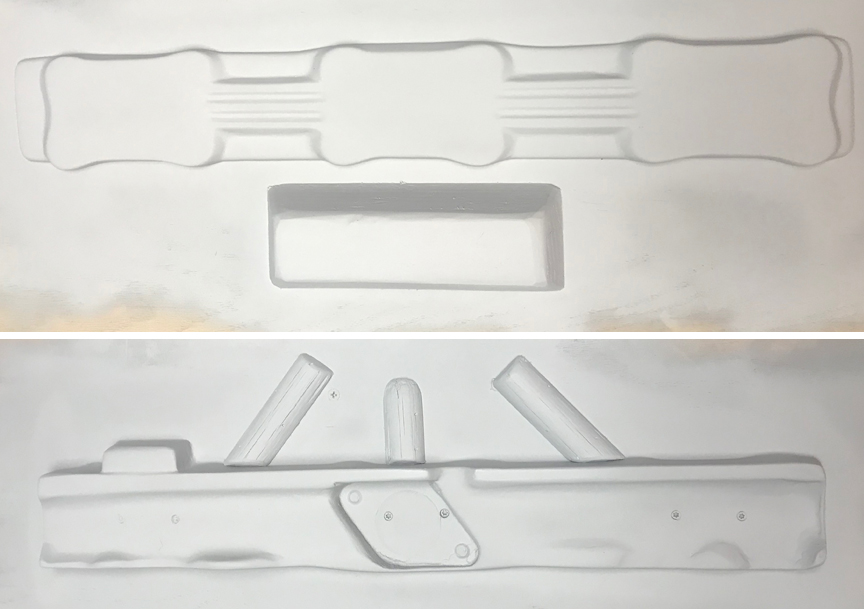
I need to do a little filling where the sprues meet the pattern and I will be ready for paint, then to get the flasks built.
See Ya,
Mike
I need to do a little filling where the sprues meet the pattern and I will be ready for paint, then to get the flasks built.
See Ya,
Mike
lavron
Well-known member
Soldmy66":1bl6rmtj said:Looks great. A question: You will have three two-barrel progressive carbs, but what I can’t tell is (i) how many openings (1 or 3) will be cut into the log, and (ii) how will cast plate attach to the log?
It will all make more sense eventually, there will be 3 holes (or 6) cut into the log just like the Offenhouser set-up, mounting it will be a combination of screws tapped into the log and possibly the carb studs as well plus some high temp RTV to seal it all down.
And yes I have 3 two-barrel progressive carbs from 89-90 Ford Escorts so mine will be a progressive six-barrel as opposed to a 4 barrel but all spread out across the length of the engine
Hopefully I will figure out how to tune the carbs :roll:
See Ya,
Mike