170 with surging issue

"...first choice would be to keep it stock.." good on ya mate!
it can B done. Ck above (the archive'n) the Handbook:

https://www.vintageinlines.com/product- ... e-handbook

gotta B a lill handy (sh!+, me mom wuz - building X-mass wreaths frm stuff in the forest, dad w/2 'kid bed rms' in da attic) may B re-build a dizzy vac advance canister or sompin... (sounds like the feedback syst)

Time will tell. Try 1st, mine's a fall back position AND not a sore thumb stickin out - stealth to all but the very decreeing eye (us odder ThriftPower guys...
:nod:
:rolflmao:
 
Welcome to the Ford Six forums TNcowboy, that's a very nice Bronco and I can really appreciate and enjoy seeing these older Fords looking stock right down to parts & engine colors, so am glad that your wanting to keep it all factory stock. If that's your goal then there isn't any reason not to keep all the LOM system parts, when working properly and tuned correctly they are quite dependable as well as giving good performance for a stock engine. There is lots of trouble with the condesors and points sets sold so look for top quality ones if you change back I usally use the NAPA Echlin (they have really good Caps, Rotors, and wire sets too), or Motorcraft are also decent. I noticed in your beginning post that that your vacuum gauge reading was good but you said its not steady this can indicate an engine with uneven compression or a sticking valve. Good that your going to do a compression test and I am leaning in that direction that your going to find out this is were the problem is. Don't think that your 1967 Bronco still has the adjustable rocker arms and solid lifters (some models such as Econolines, Ranchero's, and I think the Broncos with 170's did after 1964 to 1966) but if it is a very early build it might be possable then I would check that the valve clearance is right. Other wise you are probably in for pulling the head and doing an inspection, plus valve job.

4 1/2 psi fuel pressure should work ok, yet depending on the wear of parts the float level may need to be reset so it's a little higher than stock setting try 1/16 inch so fuel level is lower. There could also be be a Vacuum leak or leaks. A bad or incorrect PCV valve. Power valve still may not operating correctly. Another thing to consider later on during hotter weather is a fuel filter change so that excessive fuel can be returned to the fuel tank plus keep the fuel from boiling over in the fuel bowl and flooding the engine.

Below are all the video's I could find showing how to rebuild the Autolite 1100 carb and doing all it's bench settings plus trouble shooting their problems. They are a favorite carb of mine that can deliver great fuel economy and excellent Durabity. Check out some the appropriate carb videos below for info you might need, It's not that hard to pull the carb top off on the vechical but if your more comfortable doing it off the car then pull the carb. Also check if your Pertronix Ignitor gas the correct .030 gap set. There are also some later parts that can be swapped such as the 1968 to 1974 points distribtor, together with the 1968 Autolite 1100 (last year they made an Autolite carb) that would give a little better performance yet look totally stock to all but an expert. Good luck (y) :nod:

Complete set of Autolite 1100 Carb rebuild, adjustments, and also carb trouble shooting, video's

Autolite 1100 Part 1 Carb Teardown
https://m.youtube.com/watch?v=eAirfexkMVY

Testing a Brass Float Assembly
https://m.youtube.com/watch?v=wPGC5hp-RVg

Autolite 1100 Carb Rebuild Part 2 Float Assembly, Needle and Seat
https://m.youtube.com/watch?v=8bgc21iYKyY

Autolite 1100 Carb Part 3 Rebuild of the Float Bowl Assembly
https://m.youtube.com/watch?v=96wm8kcTAYI

Autolite 1100 Carb Check ball placement
https://m.youtube.com/watch?v=uiOG__H2BM8

Autolite 1100 Carb Power Valve Repair
https://m.youtube.com/watch?v=R8XilvWkP3k

Autolite 1100 Idle Circuit
https://m.youtube.com/watch?v=M_HxIZTi6Do

Autolite 1100 Carb Power Valve
https://m.youtube.com/watch?v=i2eWyUbCtJU

Autolite 1100 Carb Accelerator Pump and How it Works
https://m.youtube.com/watch?v=1yp6SABzVG8

Autolite 1100 Premium Carb Kit Parts PK111
https://m.youtube.com/watch?v=BMMwVjVKbbg

Autolite 1100 Carb Kit parts
https://m.youtube.com/watch?v=ikZs5Nd9joE

Autolite 1100 Carb Kit 436
https://m.youtube.com/watch?v=n8L2RfnG_90

Autolite 1100 Carb Flooding and Trouble Shooting
https://m.youtube.com/watch?v=QrvsdDucIXE

Autolite 1100 Carb On Bench settings
https://m.youtube.com/watch?v=fVbZ1W1oNxA

Autolite 1100 Carb Settings
http://www.carburetor-parts.com/Autolit ... p_416.html

Autolite 1100 Carb Vent Rod Adjustment
https://m.youtube.com/watch?v=uiOG__H2BM8

Autolite 1100 Carb Choke Thermostat
https://m.youtube.com/watch?v=A9Tkb_hTlRI

Autolite 1100 Carb Choke settings
https://m.youtube.com/watch?v=ZaDyq137YGI

Autolite 1100 Electric Choke conversion kit available from V.I.
https://www.vintageinlines.com/product- ... -choke-kit

New Universal Replacement Carb (these are available from V.I.) for the Autolite 1100
https://m.youtube.com/watch?v=UFRPh_TsluQ
 
Thanks for chiming in Bubba,
Regarding the petronix ignitor...even though the base plate is slotted, there's only one position that the plate will seat. I've got an extra one (new) that the previous owner gave me so I swapped that out thinking I'd adjust the gap and same thing..only seats in one position. I know they are not adjustable for some applications but didn't know if this fell into that category. But then we were driving it on half day trips with that setup and it ran great. Even now it'll fire right up.

One other question, others have mentioned that the plug pattern is somewhat normal. Is the pattern I photographed an extreme example or is it fairly normal? If it's extreme I'm thinking the compression check will lead to a valve job.

Oh and thanks for all the videos. I know what I'll be watching tonight. You guys are a wealth of knowledge.
 
Yes this is true there will be differances in plug color from the end cylinders # 1 & 6 then to the 2 & 5, with the # 3 & 4 showing as being the richest yet, even if everthing is in perfect condition. This is due to the log heads design with the carb being mounted in the center. #1, 5, & 6 are about right it looks to be a little bit extreme in this case on #'s 2, 3, and 4, it will be interesting to see the compression numbers you get on your test. Good luck in the hunt. (y) In the future when you get into restoration detailing of your Bronco here is a link to engine paint colors that might be of some help :nod: . viewtopic.php?f=1&t=80022#p622569
 
"...base plate is slotted..."
some of us use the same names for different stuff, some different stuff w/the same names (ck out our conversation w/guys fromOZ & GB) :shock:
One thing I like about gettin on line now is the pic. I luv pic! AND now we have stuff like Mike's. Glad to see more ppl gettin into him. He told me he has 1500 vids on uTube now !
So:
https://www.vintageinlines.com/product- ... acer-6-cyl
I don;t think U mean that as "base plate"?.
See the crooked slot? That is supposed to B there. U will C similar on ur carb...U R correct it goes 1 way only (properly).

Do a dry (then wet if off) compression ck. Let us know...
(y)
 
chad":1lfx6kc9 said:
"...base plate is slotted..."
some of us use the same names for different stuff, some different stuff w/the same names (ck out our conversation w/guys fromOZ & GB) :shock:
One thing I like about gettin on line now is the pic. I luv pic! AND now we have stuff like Mike's. Glad to see more ppl gettin into him. He told me he has 1500 vids on uTube now !
So:
https://www.vintageinlines.com/product- ... acer-6-cyl
I don;t think U mean that as "base plate"?.
See the crooked slot? That is supposed to B there. U will C similar on ur carb...U R correct it goes 1 way only (properly).

Do a dry (then wet if off) compression ck. Let us know...
(y)

Yeah I can see the confusion. I'm not at the shop so I'll try and describe without confusing the issue further....maybe

The base plate of the petronix ignitor...which would be the equivalent of the base plate of the points....has an elongated hole for the screw and an alignment pin. Once the ignitor is seated in the hole there is no adjustment to gap the pickup; it seems to lock in like there's 2 pins


Clear as mud..right? I'll take a picture this weekend
 
Put a set of motorcraft points & condenser back in there. Gap .025" & 37 degrees dwell & see how the engine reacts.
Don't forget to lube the cam where the points rubbing block contacts the cam.
Reset the timing.
 
Hi, I've said before that there is really nothing wrong with keeping an original LOM system. I did until recently on my Bronco. As long as you can find a quality set of points the rest should work just fine. The reality is there is plenty of room for improvement if that's what you want.
As soon as you sort out some driveabilty issues the Bronco will be running, as you said, like a sewing machine.
As usual, a few more things to consider. If you went with a Pertronics Igniter and Coil they need 12 volts, not the resistor wire from Ford, and the plug gap should be opened up to @ .045. I'm also wondering if you checked the whole PVC system, and what happens when you put your thumb on the bottom of the PCV valve when the engine is running.
That is my old reliable LOM distributor in the little picture!
Good luck
 
You guys have me thinking that I may want to change the ignitor to points and condenser. I don't know if that explains the plug pattern but I don't like the lack of adjustment with the ignitor

I'll also check the pcv valve just to be sure. Thanks for the feedback
 
Sorry but I don't think that changing back to points over the Pertronix will have much to do with changing the plug color patterns. It might even make it worse since a Pertronix used with their good coil has a hotter spark. As was stated above by B Ron Co the Pertronix needs a full 12 volts and plug gaps should be opened up to .045 gap. You can tap in original wire without cutting (I use a tap connector like is used for trailer wiring hook ups) use a stick to probe for 12 volts with your volt / ohm meter. 12 volts of power the Pertronix is just behind the ignistion switch in the Pink wire Aprox 2 to 3 inches this will be ahead of the built in resistor wire that drops it to about 8 volts, then run a new wire up to the coil + posative post and tape off the orginal coil wire. Good luck :nod:
 
No I didn't think changing back to points would cure the surge. I'm convinced that it is probably fuel related

I'm thinking it might solve an unrelated issue of not being able to adjust the air gap with the ignitor. I'll definitely check voltage.

The new compression tester is due Monday so we'll see if it's valve related

Thanks for the info
 
Can you adjust the idle mixture screw to the lean edge. This may help the rich condition on the center cylinders.
 
I can but I've got it adjusted now for max vacuum. It's probably 1.25 turns out. Seems to be a small window of running pretty well and stumbling as you adjust the idle screw. Vacuum changes quickly with a small adjustment from present setting

Also re the ignitor, the dwell is at 34 and since it's not possible to set the gap at the ignitor I'm stuck with it. Changing to points after this is resolved will allow me to set it at 37 or so
 
Here's the results of the "dry" compression check
1..155
2...154
3...159
4...164
5...155
6...160

We're at nearly 1000 ft above sea level. Specs are 155 to 195 at sea level so I'm just over the acceptable line

Need to find a syringe to put it a little oil to see if that bumps the numbers significant
 
I'd say "All set" @ those #s (not good w/math but looks w/in 10% AND nice'n hi too).
Rebuild ur current (may B), nah - Go DSII or DSII/gm 4 pin and a nice carb? Ck every thing U
can 2 C Y those 2 center's seem fouled (they will run fatter, but seem too much so
for this 'normal variation').
:nod:
 
Should have added that this test was done cold....probably about 45 in the shop when I first got in and cranked up the heater.....glad I insulated, the high today was maybe 30. Likely to be 15 or so psi higher with the engine warmed up

Still should test fuel pump volume. And that dang power valve is a question to me
 
Tests results would be fairly good. To insure a good Compression Test result fallow the below method.

1. Test should be done with engine at it’s normal operating temp ie it’s warmed up good.
2. Remove all the spark plugs.
3. Crank engine with throttle wide open and coil wire removed, or use a remote starter switch at the stater solenoid.
4. Continue cranking each cylinder until your compression test gauge needle doesn't go any higher.
5. You can use a pump type oil can/gun to squirt oil in the cylinders.

Best of luck (y) :nod:
 
Quick update

Had some time this evening to do a little more investigation

First, the pcv valve is bad. Put your finger over the end while running and the rpms drop almost 200 rpms not the 40 or so that you'd expect. I plugged the hose and test drove. Still surging and acting like it's running out of fuel. Fuel filter is good. BTW I readjusted the idle speed and fuel mix screw. Vacuum is 18.5 inches.

Re ran the compression check with the engine warm and here's the results
1...172
2...162. Added oil and it was 167. Not significantly higher
3...172
4...182
5...170
6...182

Wondering if valve lash at #2 is correct or if there's a valve problem

None of the plugs were fouled upon pulling them for the test.

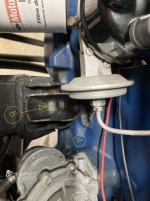
One other thing that is odd. As you know the vacuum line between carb and LOD distributor is hard line. Directly below the distributor diaphragm is the motor mount which is bowled at the bottom (see B in picture). There was a small amount of gas at the bottom and the threads on the fitting at the distributor had a tiny amount of gas residue on them. Removed the fitting to see if the line had gas in it...it was dry as far as I can tell. Also because of the gas and vacuum lines (one for distributor, one for vacuum windshield wipers) touching I don't think gas could have clung to the line and dripped into the motor mount

Here's a picture
 

Attachments

  • 4AED5E9D-9730-410D-8F78-A5AE78B65C2F.jpeg
    4AED5E9D-9730-410D-8F78-A5AE78B65C2F.jpeg
    1.2 MB · Views: 21
Compression test is excellent all the cylinders are within 10 % and you have really great high readings on each of the cylinders, ring seal is also very good I think your engine is in very good condition. Do you notice any oil use between oil changes? The bad PCV could be a cause of that and the Spark Plug color. If you happen to pull the valve cover you could also inspect the condistion of the valve stem seals for cracking or deterioration. I doubt there is any problem there either, but if there is they can be changed with head on the engine.

Any signs of the fuel pump leaking or of being replaced recently? If so that could account for the fuel stain on the vacuum line were leaking gas sprayed or was blown onto the vacuum line. Looks like you might only need to find the correct replacement PCV and then you can continue tuning on the engine or it might be all that's needed to fix the surging by just replaceing it. Best of luck (y) :nod:
 
Thanks Bubba

I did change the fuel pump quite a while ago so I don't think the fuel was from that. It was in a little pool at the bottom of the mount and wild have long since dried up if it were that old.
While the pcv is bad I'm not convinced that is the main problem since I temporarily plugged the line and drove it, Still surged and acted like it was starving for fuel. I'm going to pick up the new pcv tomorrow or Wednesday and stick it in real quick and take a drive but I'm not optimistic that is the end of the hunt.

It does not appear to be boring oil at all.

one other thing, I've noticed there may be a very intermittent leak at the coolant spacer below the carb I'm going to pull that and check the gasket to be sure though I don't notice any change in rpm or smoothing out when I spray carb cleaner on the gasket.
 
Back
Top