You are using an out of date browser. It may not display this or other websites correctly.
You should upgrade or use an alternative browser.
You should upgrade or use an alternative browser.
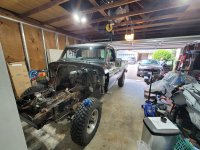
'76 F250 Turbo Build
- Thread starter jgavac
- Start date
Where's the damage? Looks like a H of a nice cooling rig!
Wiring. . . my worst nightmare, hat's off for taking that on!
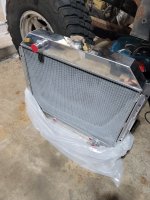
On the other side, box got whacked by something sharp in transit. Might have been okay, but the company has been really good about it and already shipped a new one to me before I even got this in the mail back to them.
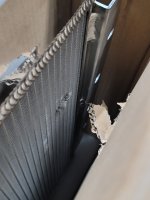
Champion Radiators in California. They make radiators for a few brands, so it's cheaper to go just to them directly. They make a ton of different radiator configurations - this one is designed for Chevy V8 swaps into dentside trucks, but it was the only one I could get from them with the lower radiator hose connection on the passenger side to match up with the water pump on our engines (other than the very small six cylinder radiator like I had before)Who did you order from?
Last edited:
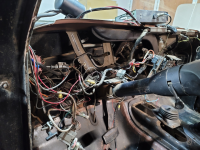
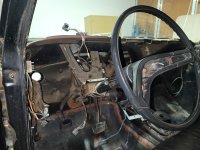
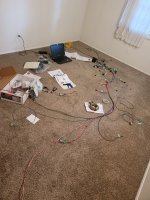
Just been having fun with wiring and prepping the dash for the new harness. Got everything labeled, I have a good idea of what wires I don't need, and I got the main harness sections in the cab wrapped up with Tesa tape.
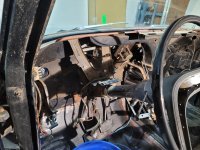
Also cleaned out about 10 pounds of dust from behind the dash from off road trips
(before)
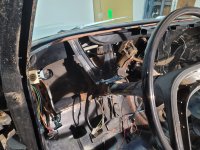
(after)
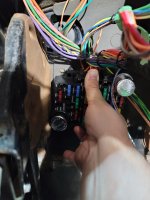
I was prepared to start laying out the truck harness in the cab tonight, but the new fuse block isn't clearing the parking brake pedal, despite the instructions saying it would. This further reinforces a small theory that I've had in the back of my head for years that the parking brake pedal assembly isn't correct for the year. Need to do a bit of research

Also cleaned out about 10 pounds of dust from behind the dash from off road trips
(before)

(after)

I was prepared to start laying out the truck harness in the cab tonight, but the new fuse block isn't clearing the parking brake pedal, despite the instructions saying it would. This further reinforces a small theory that I've had in the back of my head for years that the parking brake pedal assembly isn't correct for the year. Need to do a bit of research

Just been out here chugging through the wiring install. Making good progress, only a couple things holding me up. I didn't want to drill new holes in the firewall for the fuse block, but I ultimately did because it was holding me up from moving forward.
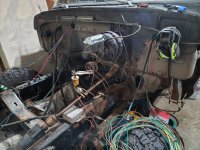
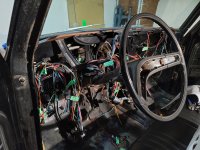
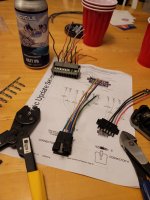
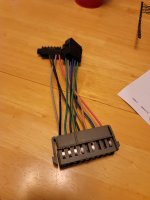
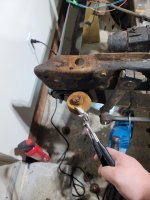
Finally went out and bought a sawzall so I could get the damn radiator mount bolts removed, so I can now hopefully finish up the painting I need to do in the front
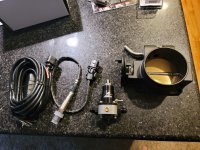
Also got some more parts... I'm running out of things to order so I must be getting close to being done, right (right..?) Sniper 85mm throttle body + IAC/TPS, aeromotive fuel pressure regulator, AEM wideband O2, and - not pictured - new TFI internals and 140a 1 wire alt.
My original plan was to have the motor back in by labor day, and as we can see, that didn't happen lol. Kinda how things go for me on this project, I always underestimate how long some things will take. Now I just gotta try and beat the rain...


Finally went out and bought a sawzall so I could get the damn radiator mount bolts removed, so I can now hopefully finish up the painting I need to do in the front

Also got some more parts... I'm running out of things to order so I must be getting close to being done, right (right..?) Sniper 85mm throttle body + IAC/TPS, aeromotive fuel pressure regulator, AEM wideband O2, and - not pictured - new TFI internals and 140a 1 wire alt.

My original plan was to have the motor back in by labor day, and as we can see, that didn't happen lol. Kinda how things go for me on this project, I always underestimate how long some things will take. Now I just gotta try and beat the rain...
It's been a crazy busy month, but I've managed to start getting things put back together, which is a nice change of pace. Replaced the turn signal switch while I was in there since I had to re-pin it into a new style plug anyway. Turned out it was the original part, so good to replace.
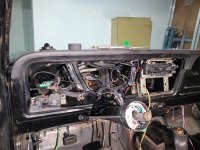
Also started to mock up some things in the front end so I can route and trim down the light wiring. At this point with how late it's getting into fall, I may skip doing any more frame painting. I don't want to leave it half done, but I want to get this thing back on the road. It's been like 2 years since I finished the engine, gotta get it running.
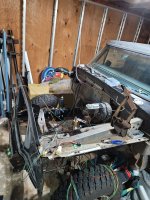

Also started to mock up some things in the front end so I can route and trim down the light wiring. At this point with how late it's getting into fall, I may skip doing any more frame painting. I don't want to leave it half done, but I want to get this thing back on the road. It's been like 2 years since I finished the engine, gotta get it running.

How's that saying go? When it rains, it pours  I had a series of tedious, costly repairs on my daily driver through the fall and winter that kept me from really doing anything on this project, plus the house I rent in flooded after a water line froze over the winter. All of this combined to not having the time, money, or motivation to work on this dang project.
Now having recently been laid off, I have an abundance of spare time now and I'm getting back going on a few projects. I'm getting all the chassis wiring wrapped up, and getting ready to paint the last bit of frame in the front.
More crucial to this original thread, I'm getting the engine and transmission ready to set back in the truck as soon as I'm done with the frame. I'll be at a point where I need the engine in the truck to measure clearances for things like final design on the intake, fuel line locations, engine harnesses, etc. So hopefully I'll be making some chunk progress in the next couple weeks.
Couple pics, in no particular order;
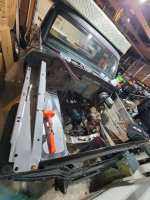
First of the new inner fenders test fit
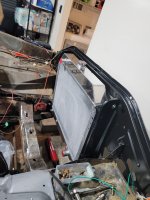
Test fitting the new radiator
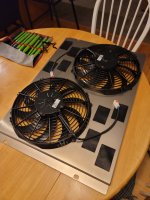
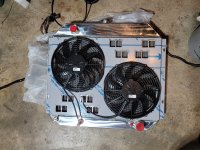
Getting the shroud setup with dual spals
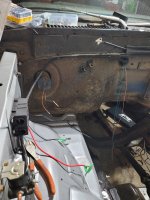
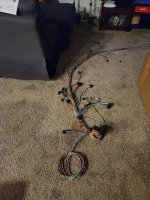
Working on chassis wiring to the passenger side
Now having recently been laid off, I have an abundance of spare time now and I'm getting back going on a few projects. I'm getting all the chassis wiring wrapped up, and getting ready to paint the last bit of frame in the front.
More crucial to this original thread, I'm getting the engine and transmission ready to set back in the truck as soon as I'm done with the frame. I'll be at a point where I need the engine in the truck to measure clearances for things like final design on the intake, fuel line locations, engine harnesses, etc. So hopefully I'll be making some chunk progress in the next couple weeks.
Couple pics, in no particular order;

First of the new inner fenders test fit

Test fitting the new radiator

Getting the shroud setup with dual spals

Working on chassis wiring to the passenger side
Last edited:
We get the reality of life-in-the-way! Thanks for the update. Is that to be a pusher fan? (nice rad and fan!) With the radiator extended like that, seems like room to the engine will be tight.
The fans can either push or pull, the shroud is set up to pull. The radiator being set back towards the engine bay is how it was from the factory, and I checked the clearance from the specs of the fan/shroud and it should clear the water pump.
The radiator itself is set up for a front mount, since the company didn't make one in a engine side flange mount with the outlet on the passenger side to match the water pump on the 300. Originally I was planning to cut the front flange off and make a bracket from the rear mount, but I was able to slide it in and bolt using the front mount bracket. It's a bit cumbersome to get to some of the bolts so I'm thinking I'll use some of the nut clips to make it easier to remove. Had I known differently at the time I could have gone with the front flange mount radiator support, but at least this matches stock even if I'm not using the rear bracket.
DON
Famous Member
Looking through your pics, one thing you you might check since you have the dash pulled apart is the pivot point for the clutch. I had the dash pulled apart on my mustang and noticed the bushing and bushing boss was wore through and was pivoting on the bracket. The make a nice replacement that has a bearing. I am guessing trucks are similar to stangs. Ford might have improved them on later models too
Nice truck too

Nice truck too
Good to know, I'll check that out while I'm in here!Looking through your pics, one thing you you might check since you have the dash pulled apart is the pivot point for the clutch. I had the dash pulled apart on my mustang and noticed the bushing and bushing boss was wore through and was pivoting on the bracket. The make a nice replacement that has a bearing. I am guessing trucks are similar to stangs. Ford might have improved them on later models too
Nice truck too
Just realized I asked this question a year ago both here and in the main sub, my memory did not serve me right 
Having a bit of trouble at the moment tracking down a water pump pulley stack. I've misplaced the one that was originally on this '76 engine, and the one I have from my 80s 300 uses a spin on clutch and has a larger bolt circle. I checked all my usual sources (LMC, Dennis Carpenter, summit, NPD, rock auto, and the chain stores) and nobody has a catalog item. Is there somewhere else that makes new ones, or is there one from another engine (Ford or otherwise) that I could use?
Last edited:
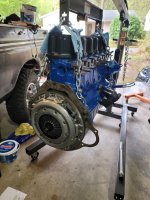
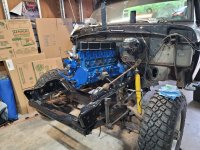
One of the big reasons I needed the engine in was to get measurements for some things and check clearances. Right out the gate, I've found a problem - the fuel rail I had made last year sticks out too far at the back and runs into the firewall. Going to need to see if it can be shortened since I'd really rather not have to have a whole new one made, but this was a risk I took by having this made prior to having the engine in the truck.
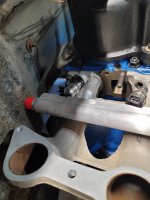
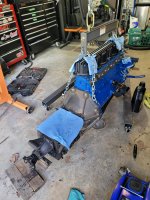
The next thing I wanted to check out was what the exhaust manifold was going to do. When I mocked it up on the engine stand, it was really close to the motor mounts. As it turns out, I had the wrong mounts (despite every parts store listing the ones I got as correct for the year), but I didn't find out until I was putting the engine in. Thankfully I still had the old ones around and they're in okay shape, but I'll probably still see about replacing them.
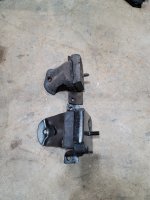
At any rate, the smaller mounts provide more room at the outlet flange of the manifold, but I'm still not terribly thrilled with where it's at. If I was going no turbo it probably wouldn't be too bad to pipe an exhaust, but I'm not liking how cramped things are.
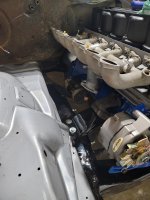
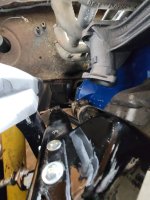
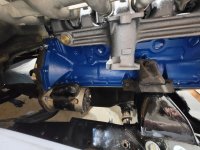
I'm contemplating if it's worth going for the front exit turbo manifold that Stainless Headers makes. It's a nice bit of kit, and if I can have them integrate the wastegate mount like their example pictures it would certainty simplify things, though it's a large expense. Would also help solve the problem of the alternator bracket interfering with the manifold currently.

The next thing I wanted to check out was what the exhaust manifold was going to do. When I mocked it up on the engine stand, it was really close to the motor mounts. As it turns out, I had the wrong mounts (despite every parts store listing the ones I got as correct for the year), but I didn't find out until I was putting the engine in. Thankfully I still had the old ones around and they're in okay shape, but I'll probably still see about replacing them.

At any rate, the smaller mounts provide more room at the outlet flange of the manifold, but I'm still not terribly thrilled with where it's at. If I was going no turbo it probably wouldn't be too bad to pipe an exhaust, but I'm not liking how cramped things are.


I'm contemplating if it's worth going for the front exit turbo manifold that Stainless Headers makes. It's a nice bit of kit, and if I can have them integrate the wastegate mount like their example pictures it would certainty simplify things, though it's a large expense. Would also help solve the problem of the alternator bracket interfering with the manifold currently.
Firepower354
Famous Member
You should be able to cut the rail, tap the end for a 90 degree fitting. Or, worst case, cut and plug the end, run the fitting between the 5/6 injectors.
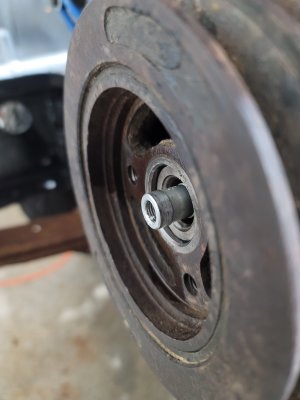
I am working on getting the front of the engine buttoned up, and that meant getting the damper installed. Using a normal installation tool, I've got the damper installed as far as it will go, and it's sticking past the end of the crankshaft by 0.015", so if I install and tighten the bolt it's going to be pressing entirely on the damper. Is this correct? There's a part of me that is thinking it should be flush with the end of the crankshaft, but I don't remember what this looked like when I took it apart.

Similar threads
- Replies
- 1
- Views
- 141
Build Thread
Turbo 250 Mod Log 2.0
- Replies
- 30
- Views
- 4K
- Replies
- 1
- Views
- 1K
- Replies
- 29
- Views
- 4K

