All Small Six 200 Idle Issues

This relates to all small sixes
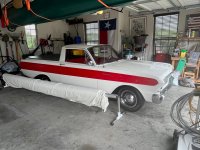
Heyo! Recently picked up a 200 from someone locally that was doing a V8 swap on their mustang. When I came to view it before purchasing, I saw it fire up cold, ran well, didn't have really any issues to speak of. I thought I was going to be on easy street, and got it for a reasonable deal.

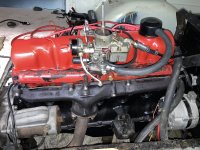
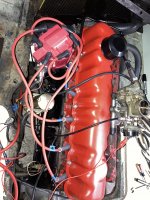
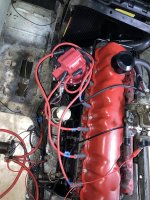
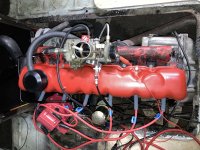
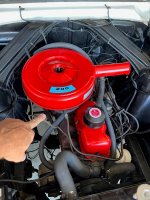
Before installing in the van, I did a small tune up job - fresh gaskets all over, new plugs and wires, HEI Distributor, and a sweet enamel rattle can job. I spent a couple of months working on it in a stand, a few hours a week, and thought I had done something that I'd really be proud of. It looked great and installed fairly easily.

After getting everything hooked up, the first crank was met with a large smoke cloud and pretty substantial puddle of coolant. The one thing I had not given attention to was the head gasket, due to the fact that I saw the engine run without any similar type of issue. So I removed the head to inspect and couldn't see anything obvious, but replaced the head gasket, and tried again - came up with the same issue. I took the head in for machining and found it needed a bit of planing. This did the trick, and after getting everything assembled with new head bolts and a fresh gasket, she fired up without the water in the cylinders.

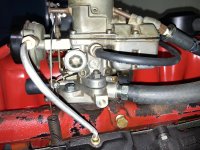
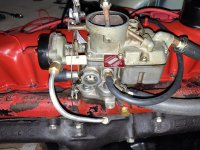
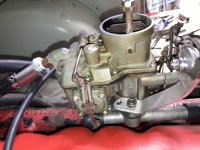
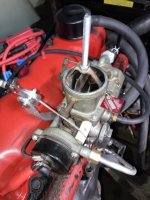
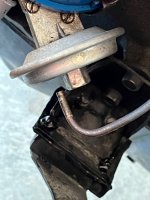
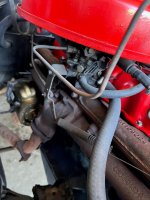
But she wouldn't idle. She will rev, but will die instead of resting at an idle. I had another Autolite 1100 carb so I did a swap and found the issue was persistent. I drained the gas from the tank and added some fresh 91, still no idle. I replaced the metal vacuum line with a fresh rubber hose, still no idle. I disassembled the carb, blew it all out with carb cleaner, sealed it back up, and got a hint of idle, but nothing of substance. After a few cranks while fiddling with the distributor position and idle screw, the battery seems to have taken a crap, and she wasn't even firing up.

Have I gone overboard? Or is there something small that I am overlooking? I know that a fresh battery wouldn't hurt, it's damn near 4 years old, but could that really be the solution to my mounting woes?

Thanks for any input/advice/help/support you might have to offer, I am running on fumes (emotionally).
 
Hi sparkplug, and welcome to the Ford Six forum! Well you have made a lot of changes and we need to know more about your parts combo. Can you post some good pictures of your carb all sides, the Distributor and all the Vacuum Lines that you have on the top of the engine, Ect.
 
Thanks Bubba!

Photos attached.

Carb only has 1 vacuum line from passenger side to distributor. Carb is pretty simple, and has worked with a different 200 setup. Distributor is

Let me know if there is any other info or photos y'all might need. ✌️
 

Attachments

  • IMG_5108.jpg
    IMG_5108.jpg
    2.2 MB · Views: 40
  • IMG_5107.jpg
    IMG_5107.jpg
    2 MB · Views: 41
  • IMG_5106.jpg
    IMG_5106.jpg
    2.2 MB · Views: 34
  • IMG_5113.jpg
    IMG_5113.jpg
    2.1 MB · Views: 33
  • IMG_5112.jpg
    IMG_5112.jpg
    2.2 MB · Views: 32
  • IMG_5111.jpg
    IMG_5111.jpg
    2 MB · Views: 32
  • IMG_5110.jpg
    IMG_5110.jpg
    2 MB · Views: 31
  • IMG_5109.jpg
    IMG_5109.jpg
    2.1 MB · Views: 35
Thank you for all the pictures it helps a lot. Yes I can see right off one major issue and one minor issue that will need to be changed. The biggest reason the engine won't run is that you have a giant vacuum leak right now with that Carb Base Spacer Fitting & Hose being connected direct into the Breather Cap. On the early small Six Engines the PCV would be placed there and this hose would then be going from the PCV (if you had one installed) over to the Drivers side front of the Engine were the old Road Draft tube used to go connecting into the engines Crankcase. On the newer engines the PCV would usually be on the the top rear of the Valve Cover yours has the early Valve Cover on it so there is no provision for it to fit into it. The Oil Fill Breather Cap Hose would then be going into the base of the Air Cleaner. Do you have any of those Original PCV parts still for use over on the drivers side? If not then you could cap off that Carb Base Hole for now so its not a Vacuum Leak or you could also change over to a newer Valve Cover with a PCV location in it to hook up the Hose too. Here is a short Video that you can see what all these early Original PCV parts looked like and how they were connected on a 1962 144 Six. https://drive.google.com/drive/folders/1CLZVlzEHzKFEYm9xI_awlyUFWL-GGtyo

The second minor problem is that your Autolite 1100 Carb is an early one that is normally used with the old Load O Matic Distributor its Vacuum line can't be used on the HEI Distributor's Vacuum Advance Canister, Plug that line off at the Carb. You will need to hook up the Vacuum Advance line coming from the Distributor to a Manifold Vacuum Source Below the Carb's Base, there is one there that has a Brass Plug in it you can get a Line fitting to install into that hole then that Vacuum Source can work for the distributor. One Finale note after you get it running again, those HEI Distributor Clone's will have way to much Advance in them since its a design borrowed from the Chevy V8's so be carful not to get into Detonation you will need to do a considerable amount of work on it to get the advance right. Best of Luck
 
Bubba, you’re a damn genius! I followed the directions and she fired up and purred like a champ. I’d take you out for a steak dinner if I could.

So with the distributor I have, do you have any thoughts on where the timing should be? I have it at 8 now. This engine is connected to a manual transmission.

Thanks again Bubba!
 

Attachments

  • IMG_5114.MOV
    41.2 MB
Thank you for the kind words sparkplug! I would put it to at least to 12 degrees BTDC, that was where I would set them at when I lived in the SoCal area. Some go to as much as 14 to 18, the trouble though is going to be what your total timing ends up being with what the HEI unit already has in it as well as how much the Vacuum Advance will then add at a "steady state" Cruse on the Freeway you might want to hook up a vacuum gauge so you can tune it better. I am also sure you will need to limit both the Mechanical Advance and Vacuum Advance so there is no Pinging under a load. Good luck
 
Some more info that hopefully is of help to you on the tuning. On your Total Timing you would be looking for 34 to 36 Degrees for these small ford sixes. On the Vacuum Advance a total of around 40 to 45 this takes a lot of testing to learn what your engine is going to like though and that is were a Vacuum gauge can help some even use a couple of them. On the Autolite 1100 Carbs there is a simple way to convert it over to ported Vacuum for use with your Distributors Vacuum Advance this is the Drop A Load Mod if you want to learn how here is the link. https://fordsix.com/threads/delete-scv-on-1100-autolite-for-ported-vacuum.76821/

For Tuning your Distributors Total Timing You would need to start by verifying that the TDC mark is correct by using the Piston Stop Method. Then you can make the additional Timing Marks on your Damper for tuning. Our site member "FTF" (French Town Flyer) recently reposted about his low cost method of adding these additional timing marks to the damper, here is the link to it. https://fordsix.com/threads/degreeing-the-damper.78838/

There is also a site member here "wsa111" that does the Advance Curve retuning on these HEI's and the Ford Distributors if you wanted that service here is a link on contacting him. https://fordsix.com/threads/have-no...r-engine-the-over-oiling-mod-performed.81715/
 
I think I'm in the right spot. Thank God. I have a 64 Ranchero and recently was cleaning and poking about in the engine compartment and the vacuum line that feeds into the vacuum advance Diaphragm Assembly popped out of the brass nut that screws into the vacuum advance. I looked at the metal vacuum line, took the nut out of the diaphragm and looked for a small compression fitting or O Ring. I found nothing. So, being the genius I am, I put the metal tube for the vacuum back into the brass fitting, and placed both back into the diaphragm, and tightened it up. Pulls right back out. Now, when driving i note that as speed increases it stalls or stutters a little bit. Not a lot, but enough to make me think that vacuum leak is the culprit. I have the 64 Comet and Falcon Shop manual, and they do show a round gasket that goes into the hole between the calibrating springs and the vacuum connection (brass fitting - see pic). But, they don't show anything relating to the actual vacuum line itself or whether there is an o ring or something that goes onto that metal line before it goes into the fitting. Any advice would be appreciated. I've attached a few pics of the vacuum line from passenger side of carb to distributor. More concerning now is that after looking at the diagram, nothing came out of the side of the diaphragm assembly when I removed the fitting. i.e. no spring, no stop, gaskets or calibrating washers as depicted in the manual. Thanks.
 

Attachments

  • 64 Ranchero.jpg
    64 Ranchero.jpg
    649.1 KB · Views: 11
  • Close up of Vacuum line, with a kink near end. Compression fitting perhaps.jpg
    Close up of Vacuum line, with a kink near end. Compression fitting perhaps.jpg
    440.7 KB · Views: 11
  • Diaphragm Breakdown.jpg
    Diaphragm Breakdown.jpg
    659.9 KB · Views: 11
  • Vacuum Connection to Carb.jpg
    Vacuum Connection to Carb.jpg
    651.4 KB · Views: 11
  • Vacuum Line, Diaphragm and Vacuum Connection.jpg
    Vacuum Line, Diaphragm and Vacuum Connection.jpg
    459.7 KB · Views: 11
  • Vacuum Line.jpg
    Vacuum Line.jpg
    723.3 KB · Views: 11
Hi Kentucky Colonel, and welcome to the ford Six Forum! It looks like you have one of the newer replacement type Load O Matic Distributor Vacuum Advance Canisters so its not going to have any of those same removeable parts as depicted in the picture of your 1964 Falcon & Comet Shop Manual. Below is a Picture of this newer type Canister does the Vacuum Line Port look the same inside as that one?

In looking at the first and fourth Pictures that you posted above it looks to me like the Original Vacuum Line can still be repaired on the Distributor fitting end. It appears that you would only need to cut off about 3/8 to maybe a 1/2 an inch only go just enough to remove the Damaged area of the Line where its been compressed. Then get a New Fitting (see Below Link) and reassemble as in the below instructions. The most important part is that you hold the Vacuum Line in the fitting so that its bottomed out before and while you start to tighten up the new fitting. Or if you wanted there is a Brass fitting mad that has the Flare Seat on it to go into the Vacuum Advance Canister with a Barbed hose end and then you could use a short piece of Rubber Vacuum Hose 2 to 3 inches long to slide onto the Steel Line and connect up to the Hose fitting without any cutting to the Line. Best of luck.

You can Repair or make a replacement for a damaged or missing Steel Vacuum Advance Line for use with the Holley 1904 and Autolite 1100 Carbs and a few others. Some these Carb's that Ford used will also have that same matching threaded port that the Vacuum line screws into at the Distributor. On these carb's & Load O Matic Distributors a steel line is used with a compression type fitting, these fittings are the same ones as are used on a natural gas water heater pilot light. This is a compression type fitting that fits the threaded hole in the Holley carb (see in link below). They should be available at many locale hardware stores or at your local Auto parts or NAPA Parts dealer too.

https://www.supplyhouse.com/Honeywell-3 ... 13870000-p

This above fitting is made for use with a 1/4 inch Steel or you could use a Aluminum line if you don't care about its originality, stock the Ford's & Mercury's used a steel line. If you have the old vacuum line for use as a pattern you can use a tubing bender or by bend the line hand to match the original bends in the old line. If you don't have a pattern you will have to free form fit it to your engine. To install thread the compression fitting into the Vacuum Port and but leave it somewhat loose next push the 1/4 inch line into the compression fitting until it bottoms out then you tighten up the compression fitting. On many of the the LOM Distributors the same compression fitting is used to connect to the stock vacuum canister so you may need to get two for a stock system. If you are going to use or already have a later Distributor then run the line down near the Distributor Advance canister and use a short piece of rubber hose to connect the Vacuum line to the Vacuum Advance. On some other carb's Ford used a flare fitting for the vacuum line connection into the carb in these cases a brake line of the right size can work or if you have use of a flaring tool you can also make a new line from scratch.
 

Attachments

  • LOM Distributor Vacuum Advance Canister.jpg
    LOM Distributor Vacuum Advance Canister.jpg
    51.8 KB · Views: 1
Thank you Sir. I assumed looking at it that it was a compression fitting, and I couldn't imagine all those parts were just missing as I was reaching down in the engine bay when I knocked it loose and thought it odd it was that loose. May have been for some time. I'll run out to NAPA in a few. Really appreciate the guidance. I had a 200 in my first car, a 68 Stang. I did what all dumb kids did in 1980. Ripped the 6 out and dropped a 302 in her. Then I sold the car and married. No I have neither of those. The good news is wife two and 200 CI 2 are both a much better deal than either of the first ones! I'll let you know how it goes. In a few weeks I'm ripping the front suspension out and going after the drums brakes as well. 35 years around aviation and I'm about to pack it all in. Then it's time to really start playing with the Ranchero. I've seen a lot of 200's that after some mods are putting out some decent HP. I think that is in the short term 1-2 year goal category. Cheers.
 
Bubba, appreciate the tips. Found exactly what I needed at Ace Hardware, fit perfectly, after removing a little of the old line, the compression fitting held it tight. Took a test run and no hesitating or sputtering at all once I'm moving through 2nd and 3rd. Appreciate your advice and guidance.
 
@bubba22349 Just wanted to follow up here - I put the Load O Matic Distributor back on and the engine is starting up great, no pinging under load, all tuned up on that end. Happy as a clam when she's started in the garage.

Now that I am running it a bit around town and doing some light-duty testing on the highway, I am seeing the oil pressure drop significantly when warm. Upon starting, the pressure is at 45psi, but after things get warmed up, the pressure drops to about 5-10psi. It does increase when revving, but not to where I believe things would be "healthy." I changed the oil from 10w40 to straight 30wt. and have seen no difference. At the time of the oil change, I removed the pan and inspected and cleaned the oil pump - everything looked tight and trusty. I changed the sending unit and do not have the oil light illuminating, but my SW mechanical gauge shows the pressure drop. No leaks on that system either.

So I am thinking of making the switch to 20w50 and seeing if we can maintain the pressure when warm. I have read all of the theories on worn bearings, but I do have to say at this point, I'm not too inclined to replace main and rod bearings with the hope that the pressure holds steady. Though I do not know the complete history of this engine, everything appears to be within tolerances and could have possibly been rebuilt not too long ago. In my studies, I have seen some comments that if the increase in oil weight works, just go ahead and keep running it. I'm in San Diego, so I never really face too much cold weather.

What are your thoughts here? Thanks again for all of your help!
 
Hi sparkplug, glad to hear you are making some progress. I am fairly sure the stock Oil Warning Light sender was factory set so that it only took 4 PSI of Oil Pressure to turn it off. Therefore if you seeing 5 to 10 PSI at the Idle RPM that is quite safe, and if you have 35 to 45 PSI at higher speeds of like 45 to 65 MPH that should also be safe. Back in the days before the multi grade oils on engines that were higher mileage and were starting to show lower Oil Pressure readings, I then would switch over from a straight 30 weight up to a straight 50 weight, so yes the 20 W 50 should be very good for it. Also if the oil pump is still in good condition its also possible to shim the pressure relief spring with a washer or two to also raise the Oil Pressure up some. Good luck
 
my 200 SB6 is a later design with the motorcraft 1946 carb, and Duraspark II ignition. the maintenance tag on it states to remove the vacuum from the distributor, and block off the hose, then set the timing to 10 BTC. I have had it running like that for over a year now as a daily driver, and put 18K miles on it since that adjustment. hope this helps @sparkplug

I have been running 5W20 full synthetic oil for those miles, and haven't seen an issue, however my 200 is in an 'idiot light only' system, so I can't give you a good idea of where my oil pressures have been running, however, I can tell you my overall engine temps plummeted, and she is running much cooler, and averages about 28-32 mpg depending on what I am doing; and thats with a minor vac leak that I still haven't fixed because I lost all the data on the research I was doing to fix it (sorry Bubba, I know you helped me a lot with it, but I can't find it anymore)
 
I have been running 5W20 full synthetic oil for those miles, and haven't seen an issue, however my 200 is in an 'idiot light only' system, so I can't give you a good idea of where my oil pressures have been running, however, I can tell you my overall engine temps plummeted, and she is running much cooler, and averages about 28-32 mpg depending on what I am doing; and thats with a minor vac leak that I still haven't fixed because I lost all the data on the research I was doing to fix it (sorry Bubba, I know you helped me a lot with it, but I can't find it anymore)
Hi R_Calris I sent you a PM on the location of that research. Good luck
 
@bubba22349 Just wanted to follow up here - I put the Load O Matic Distributor back on and the engine is starting up great, no pinging under load, all tuned up on that end. Happy as a clam when she's started in the garage.

Now that I am running it a bit around town and doing some light-duty testing on the highway, I am seeing the oil pressure drop significantly when warm. Upon starting, the pressure is at 45psi, but after things get warmed up, the pressure drops to about 5-10psi. It does increase when revving, but not to where I believe things would be "healthy." I changed the oil from 10w40 to straight 30wt. and have seen no difference. At the time of the oil change, I removed the pan and inspected and cleaned the oil pump - everything looked tight and trusty. I changed the sending unit and do not have the oil light illuminating, but my SW mechanical gauge shows the pressure drop. No leaks on that system either.

So I am thinking of making the switch to 20w50 and seeing if we can maintain the pressure when warm. I have read all of the theories on worn bearings, but I do have to say at this point, I'm not too inclined to replace main and rod bearings with the hope that the pressure holds steady. Though I do not know the complete history of this engine, everything appears to be within tolerances and could have possibly been rebuilt not too long ago. In my studies, I have seen some comments that if the increase in oil weight works, just go ahead and keep running it. I'm in San Diego, so I never really face too much cold weather.

What are your thoughts here? Thanks again for all of your help!
Hello SparkPlug. Glad your engine is running better, hope you get some more oil pressure. I noticed something in your pictures that you might want to address before long. Looks like you have an accelerator cable set-up instead of linkage. It runs to the opposite side of the carb from the throttle shaft arm, and so makes a sharp angle over the choke housing attachment to get down to it. Looks like maybe it goes over a plastic sleeve or something to prevent chafing, not sure if there's actually some roller action there or not. Could be trouble sooner or later, sawing through parts or perhaps jamming.
 
Bubba, appreciate the tips. Found exactly what I needed at Ace Hardware, fit perfectly, after removing a little of the old line, the compression fitting held it tight. Took a test run and no hesitating or sputtering at all once I'm moving through 2nd and 3rd. Appreciate your advice and guidance.
Welcome Kentucky Colonel. Glad your issue was resolved. My dad was a Kentucky Colonel. I still have a sticker in the back window of my Mustang.
 
So I am thinking of making the switch to 20w50 and seeing if we can maintain the pressure when warm. I'm in San Diego, so I never really face too much cold weather.

What are your thoughts here? Thanks again for all of your help!
Greetings sparkplug. Going to the heavy oil is a good solution for lower pressure caused by increasing bearing clearances, I've done it on many engines, diesel and gas for many years. The oil film layer must be maintained between the bearing shells and the rotating iron, and thicker oil stays in the space longer. It can add years of service life to a high mileage engine with normal age-wear.
You may experience lifter, and possibly a crank bearing rattle on cold start up- it takes longer for the pressure to build. The lifter click, no biggie, but if the crank is starved and clatters on cold start-up, go back to a thinner oil, or devise a way to increase cranking time before the engine fires-off.
Low oil pressure is not "bad" of itself, the limit is when the friction film of oil gets sheared and there is metal-to-bearing contact.
I am not an advocate of gas or oil additives, with one lone exception: Lucas Oil Stabilizer. I won't burden the thread with my resume', but used correctly this is an excellent product for filling the excessive clearances and maintaining oil film integrity in even very highly worn engines, trannys and rears. Your engine sounds like it's ok, so start with a quality 20w-50 oil, and if the pressure is still lower than you prefer, add Lucas, keeping track of the % of oil/Lucas for future reference. Your "thick limit" is bearing starvation on cold crank up.
Peace.
 
I have 78 200 with new main, rod + cam bearings. The crank has never been turned.
On a hot day the oil pressure would drop when I applied the brakes causing my 15 lb electric fuel pump oil pressure switch to open.
I changed the oil to 40 weight. The hot oil pressure now never goes below 15 lbs on a hot day.
I may change to thinner oil before next winter.
I ran the 40 wt last winter without any problem except slower startup pressure.
I am in California where it doesn't get very cold.
 
Last edited:
Back
Top