It sounds like you’ve got a solid plan.
To answer and ask some questions: The block has the following cast numbers: D8 BE 6015-GE, and the starter sits high so I'm glad to read that i'll be able to use some stainless steel split headers. Where can I purchase the exhaust divider that gets welded to the head? Somewhere where I can reach a person when I call to order to make sure it's in stock, and also don't have to wait months out to receive.
I bought my exhaust divider from CJ Pony Parts. They tend to always have those in stock. You will need to grind the inset part of the divider to fit the opening 100% properly and then it will need to be welded or brazed in. I’m not sure what is the better method. I’m leaning towards brazing because welding might be too inflexible and prone to cracking. Maybe someone else here can pipe up and lend an opinion.
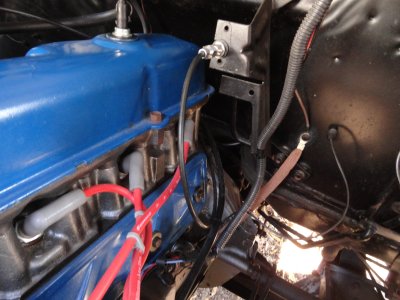
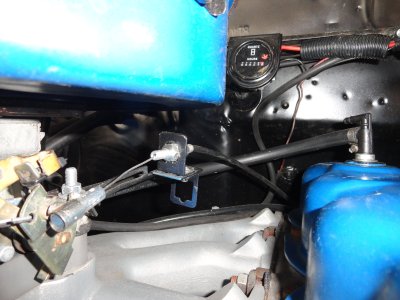
The head has the following cast numbers: D8 BE 6080 BA, and we will not be milling the intake for the carburetor. We are thinking about installing a 2V Weber with the adaptor kit and making some kind of linkage to accept a cable. We want the throttle cable to come around the back as opposed to going over the valve cover; maybe someone has some pictures to share. Hopefully some one can point us in a direction where we can purchase an aluminum, ribbed valve cover (in stock) other than the Aussie Speed Shop.
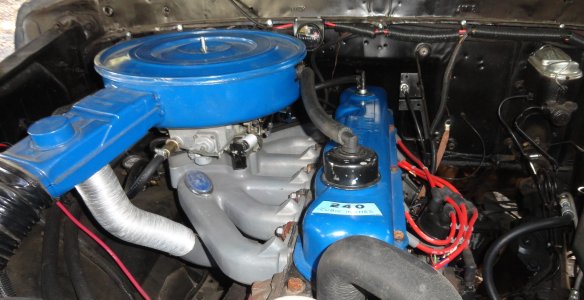
I put the Clifford/Redline Weber 38/38 carb on mine. It is a 2V carb where both barrels open at the same time. The kit came with the intake adapter which is like a funnel that reduces the 2v opening to a smaller diameter to mate with the intake. It is almost bolt and go. I changed my idle jets and adjusted the idle mixture and it’s pretty much done. I did adjust the idle mixture about 3 time after I had set the “best lean idle” which is a Weber set up concept. I idle at about 750 RPM. The electric choke is pretty decent as well. I have it set up to fast idle at around 2000 RPM. There is also a progressive Weber called a 32/36 where it has a 32 primary and a 36 secondary. I don’t know which would be better for you daughter’s car.
The linkage on my mustang is actual rod, linkage. It was very simple to connect to the carb but a cable would likely be as easy to connect.

So the engine is at a friends machine shop where it will be getting bored 20 over; we will install new pistons, rings, and bearings. The crankshaft will be getting polished as it looks really good and true. The head will be getting new stainless valves, new seals, and springs. I'll have to discuss milling with machinist for deck height along with three angle grind as I know very little about engine building. I have been educating myself along the way and passing the information on to my daughter. We have both been reading the "Ford Inline Six" book and I hope to buy the "Falcon Performance" book as soon as I find a copy in stock. I'm lucky to have several friend's and family members that have built engines and know how to put them together. They are wiling to guide us through the steps to get this build done correctly.
Again, thank you in advance for your assistance. We would greatly appreciate if anyone can answer or chime in on the questions above.
Rich and Sierra
Great that you have a friend with a machine shop. I used Silv-o-lite pistons but there are others. Rock Auto is your friend.
I used sealed power moly rings which require a hone for moly rings. The benefit is that they set pretty much immediately. I was absolutely blown away at how quickly the rings set. I haven’t built an engine for many years and was prepared for the typical 500 miles of monitoring and topping up the oil. Not this time. The rings set and it used no oil during break in. Make sure to gap your rings.
I used Mahle/Clevit bearings, also from Rock Auto.
Regardless of what cam you choose (stock or aftermarket) use a degree wheel and measure your cam timing. If I had just lined up the dots on mine and put it together, it would have been 10 degrees advanced which would have increased bottome end power but it would have lost power in the top end. I installed an after market cam with a double roller timing chain and adjustable crank gear so I was able to dial it in precisely.
The tricky part was the rear main seal. The rear main seal was a rope seal. I wanted a rubber seal but they no longer make one. Some guys will take a 289 seal and cut it down to size. I didn’t want to do that so I bought one that is manufactured for Olson Gaskets:
https://www.olsonsgaskets.com/gaskets/ford-6-cylinder-144-170-and-200-ci-rubber-rear-main-seal/
Regarding shaving the head… I believe your rockers are non adjustable and the push rods are the regular type with rounded ends on both ends. If that’s the case, if you deck the block and shave the head, you will need to measure and have shorter push rods manufactured for the engine. You could also, get adjustable rockers and the appropriate push rods for that type of rocker. Definitely not a deal breaker but something to keep in mind when you decide what you want to do.
Anyway, keep up the build and photos.