Holley 1946 1.75" Spacer plate

MrMootsie

Well-known member
Hi,

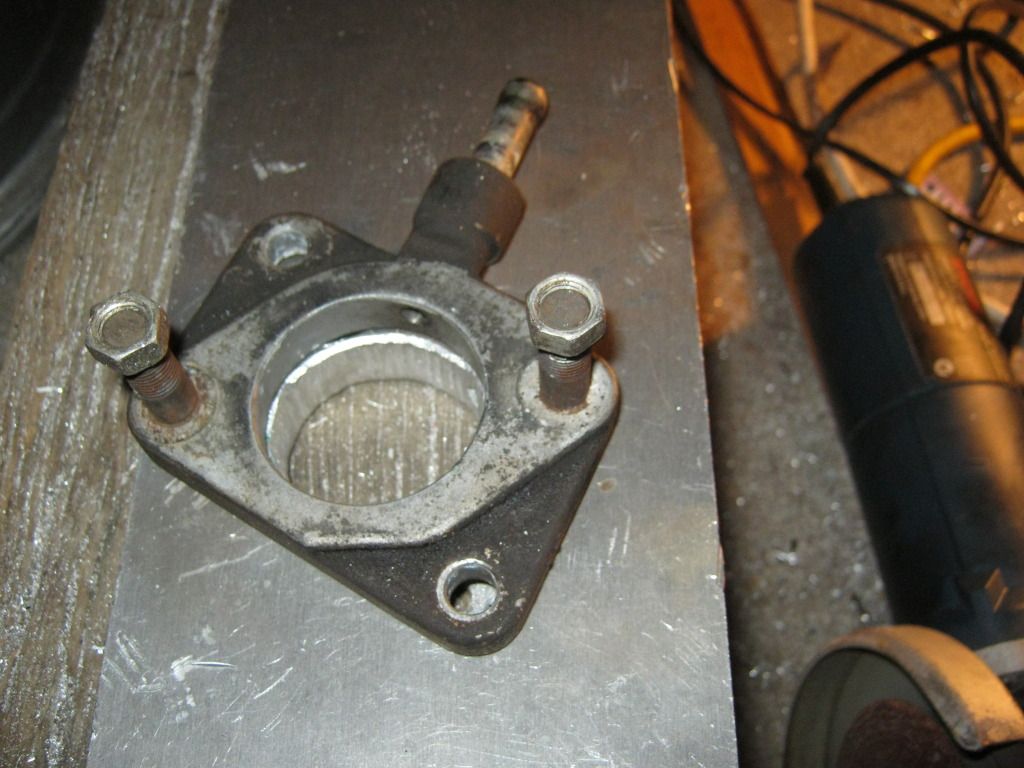
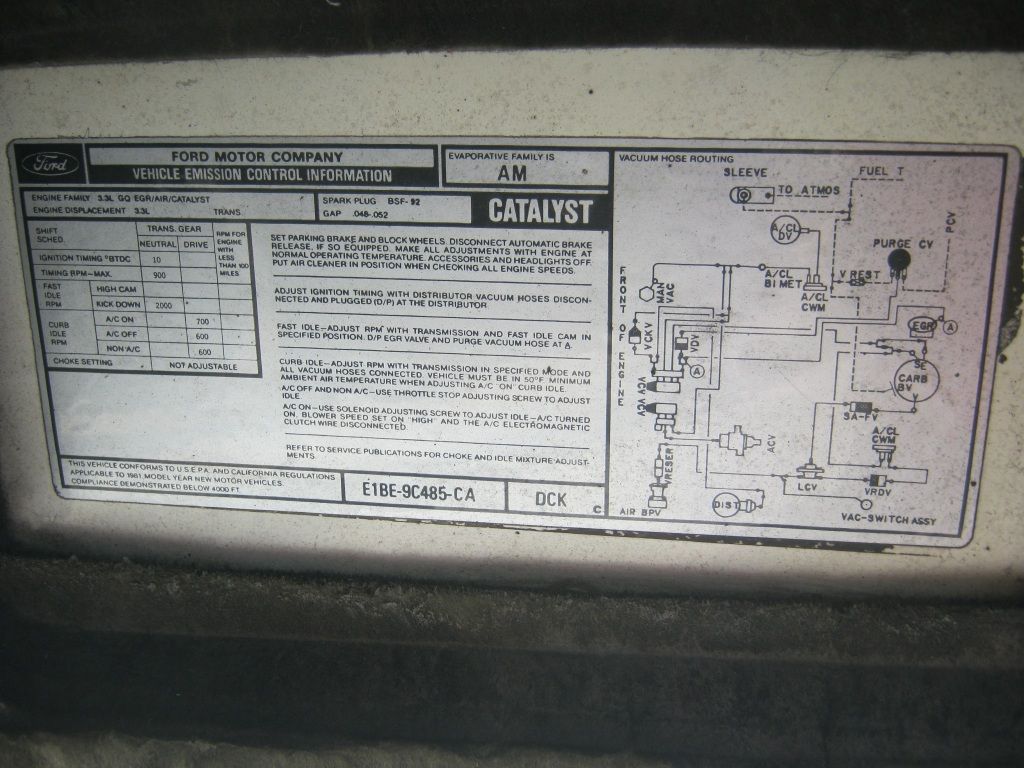
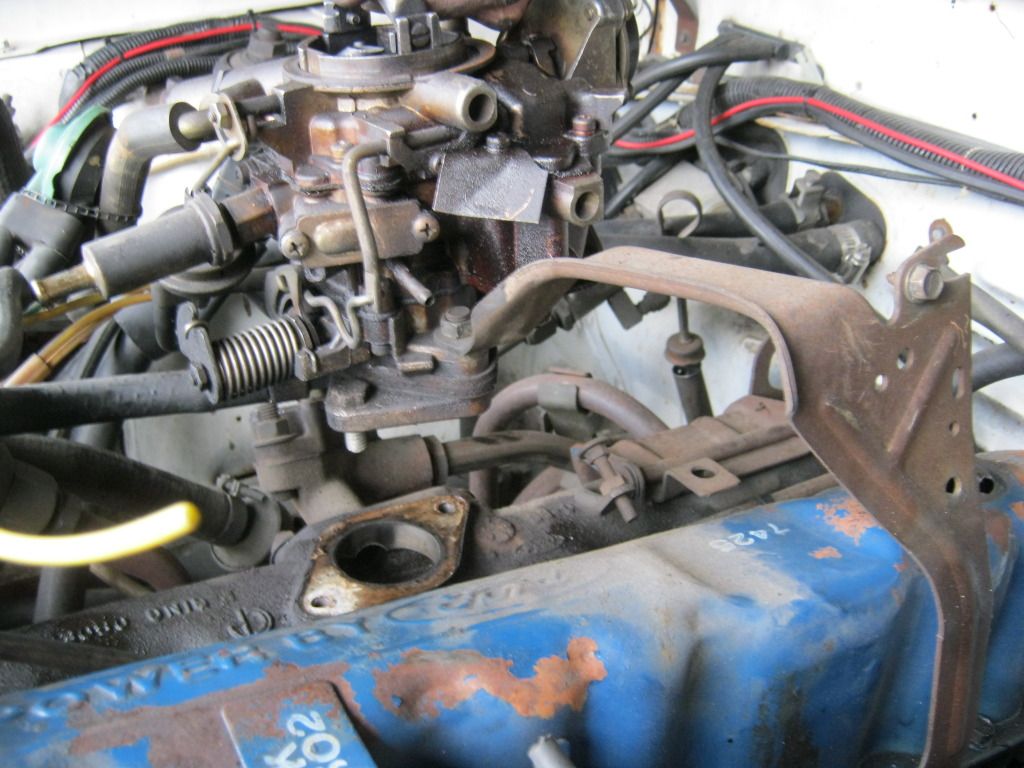
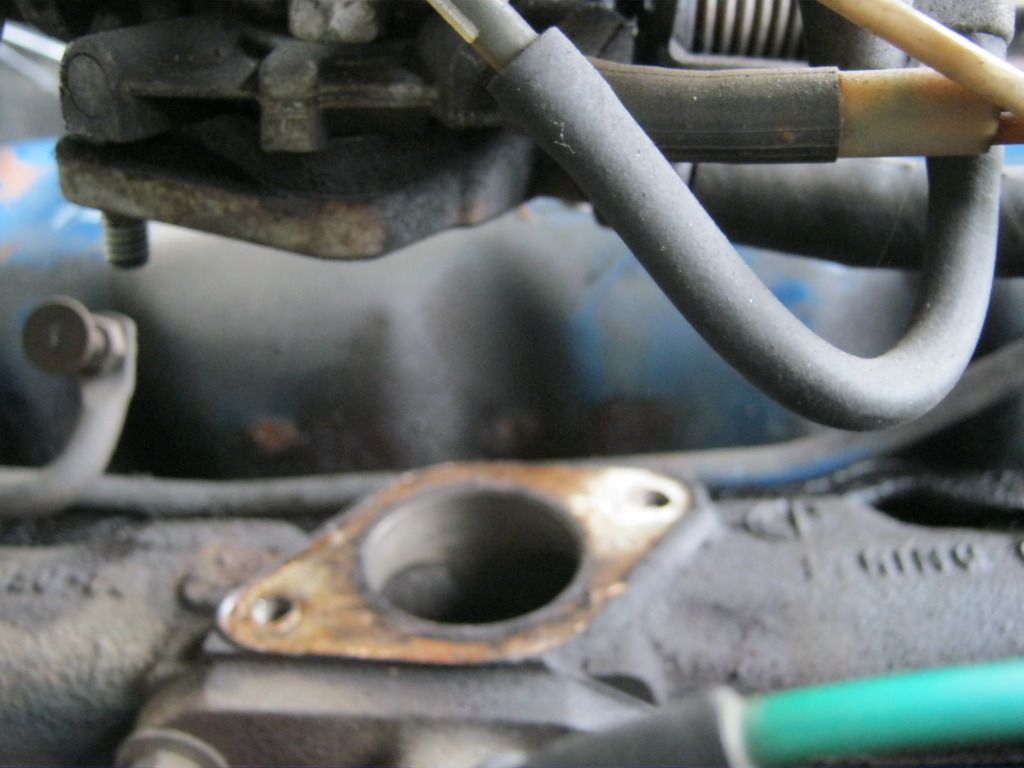
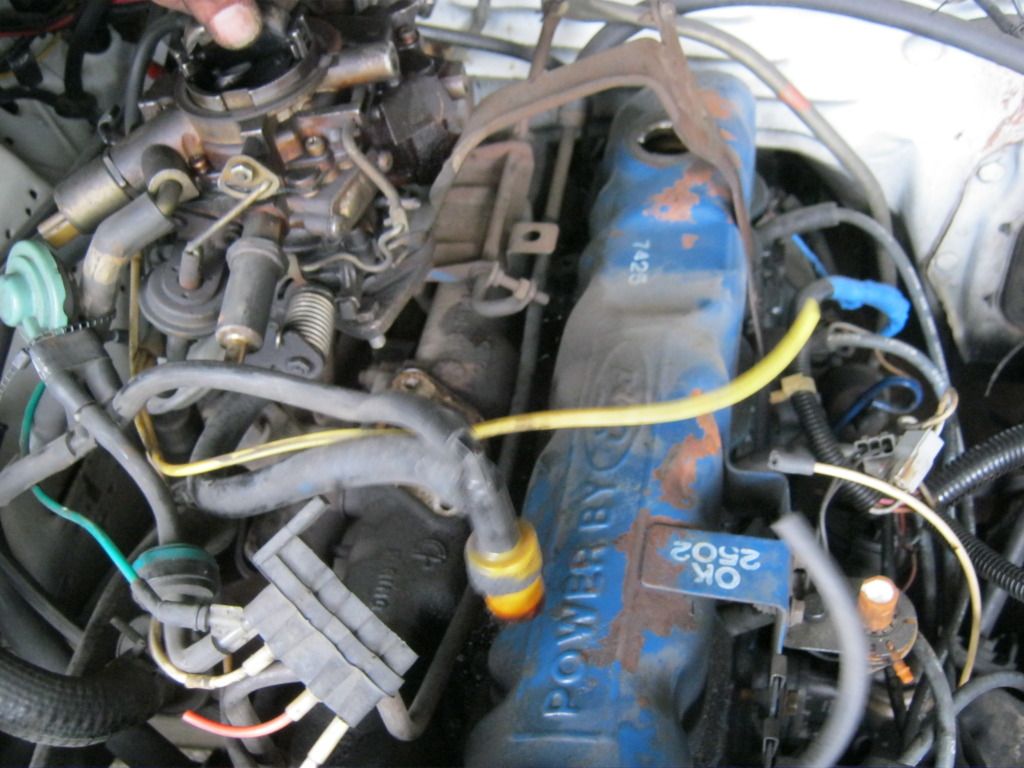
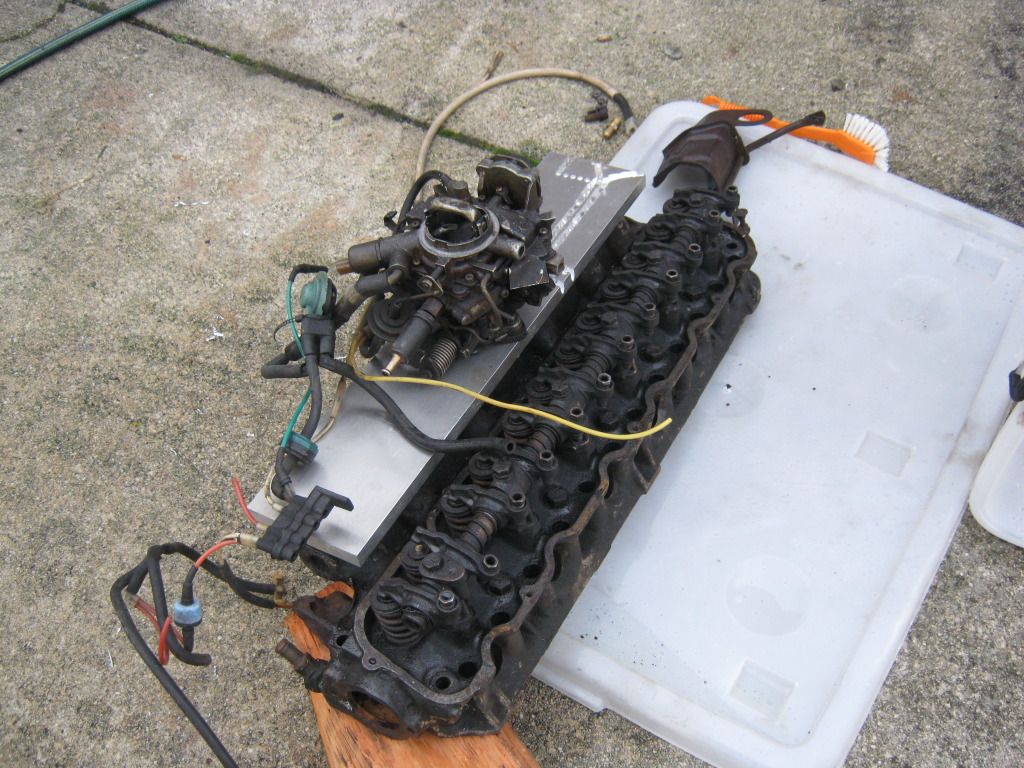
Putting on a 1946 on my 65 200...actually, it's a late model head with the 1.75" throat. The 1946 also has a 1.75" throat. Unless I have my head where the sun doesn't shine, what I am now looking for is a spacer plate that correctly rotates the carb 90 degrees. Same thing that my current 1.75"-1.50" Autolite 1100 spacer does.

Anyone with any ideas?

and, while we're talking about it, there is the matter of the air cleaner...the 1946 does not have a "standard" air cleaner configuration, and I don't have access to a stock one.
 
The carb spacer is a vintage piece and may only be available used, like this one...
http://www.ebay.com/itm/Mustang-Ford-68 ... cb&vxp=mtr
EDIT: You can see it has the pvc fitting and the channel cut for the auto choke vac source.

You can find them on ebay from time to time. I'd still check with the seller for the bolt hole spacing and bore diameter IIWIYS to be sure it will work with your later 1.75" 1946.

I'm not sure of the diameter on the choke/upper air horn opening on the later carbs, but hopefully Mike has an option(s) for you. Good luck (y)
 
Alternately you can just buy a big hunk of aluminum and with some drills and some taps make one. I have a home made one I used to put the 1 3/4" carb on the small log head that I made a 1 1/2" x 1 3/4" oval hole in. Its just a matter of cutting a 3/4" to 1" thick rectangular piece and drilling 2 bolt holes and drilling and tapping 2 holes for the studs, then drilling and tapping a plumbing fitting on the side for the PVC to hook to.
 
I may end up just doing exactly that. I'm waiting for Mike's response tomorrow, and I contacted the seller on the ebay auction. It's a 68 spacer, and I don't think they went to the 1.75 head until 69.

we will see.
 
All Ford log heads have a kind odd "ten past three" 16 degree splay angle for the carb mount. They do that so the head can be torqued up, then the carb adaptor goes on. The carb adaptors are usually a whole bunch of spacers which use the 'normal' six o'clock bolt pattern.


Easy to make one. I made one to suit the earlier small log head (1960 to 1968), based on the 1978 to 1983 T,B and X code version for the 3.3's


And go through about three hours of cutting, bending and hacking the 1/2 inch alloy tooling plate to suit.
The adaptor was cut down to this size


Then JB Weld added to fair in the 225 thou annular ledge formed when the 1.75 carb meets the tiny 1.3" early round body head.
JB Weld in the anular part between the 1.75" Holley 1946 base and my 63 heads 1.3" Holley 1909 base. I had to grub screw pin and loctite a barbed/fluted steel PCV port line.

 
Excellent, your onto to it.

Love the 1946, its got some issues, but its really realiable, and the three electric hookups, idle stop solenoid(anti -dieseling) , the electric choke and the Fuel Control Valve for the catalyst allow you to tailer it to suit the older log heads. Runs great on my small chamber 170 cubic inch head.

 
which of the many vacuum connections are you running distributor vaccum? Running PCV vacuum off the adapter, and I'm puzzled by the many options.
 
MrMootsie":2w5ewj5i said:
which of the many vacuum connections are you running distributor vaccum? Running PCV vacuum off the adapter, and I'm puzzled by the many options.
Its easy when you have vac line and emissions line pictures! Then the red, yellow, green and blue color coded make simple sense


The quick answer is the yellow line from the Duraspark goes to the double line to the base of the passenger side of the carb. See 6635, 6636, 6637 and 6741-1 below
 
that's still not entirely clear to me. It looks like there is a small curved vacuum connection at the base of the carb, passenger side, but this does not appear to be ported vacuum.
 
MrMootsie":1rw845s7 said:
that's still not entirely clear to me. It looks like there is a small curved vacuum connection at the base of the carb, passenger side, but this does not appear to be ported vacuum.
Afirmative, it is the spark valve in the carb, but it is a ported vacuum source due to the way it convelutes to the point above the throttle butterfly, not manifold vacuum.

Picture 6636 shows it as best I can.

http://i1215.photobucket.com/albums/cc5 ... G_6636.jpg

Devils in the detail with these carbs. Up till 1973, the Vac diagrams are shown in good detail, but after that and up till 1983, our 200 sixes had other systems in place.

See viewtopic.php?f=1&t=66979 for the IMCO parts, specifically the third link down showing the 1973 set ups for 200 and 250 engines, the year before Duraspark I hit town in our I6's.

http://www.mustangbarn.com/73vacuum.html. The 200 and 250 auto diagrams show spark valve access to the carb

I'll try find another 1946 diagram, there was one posted a few months ago.
 
I ditched the solenoids on my 1946. I run the distributor vacuum from the "spark" port high up on the driver side of the carb.
It works well.
Not using any ported vacuum switches.
I have also drilled a hole in the throttle plate to allow the 264/274/112 cam to get into decent idle range.
I still run a vacuum out to the charcoal box thing to collect vapours from the vent on the top of the carb.
Cut a spacer out of a dollar store cutting board and sandwiched that between a couple of homemade gaskets.
I'd like to find a suitable replacement for that out of aluminum or phenolic.
 
Yeah, the red sustain canistor side can work.

I love your neat installs, Jack, especially the 3G alternator, EGR blankoffs and nice yellow and gold hues in your Fox Mont

I guess if your not using the emission stuff, then you can make it work. Im back to 65 in my Fox for main jet.

The 1978 set up is different, but here are the red, green, yellow and blue hose diagrams to the 1946 carb if it helps at all. Jack uses the red color connector to get his ignition vac

http://vb.foureyedpride.com/showthread.php?t=61971

I'll post the port on pictures 8861 http://i1215.photobucket.com/albums/cc5 ... G_8861.jpg,
8862 for the red coded stuff http://i1215.photobucket.com/albums/cc5 ... G_8862.jpg.

Yellow is 8863 http://i1215.photobucket.com/albums/cc5 ... G_8863.jpg
8864 is idle stop http://i1215.photobucket.com/albums/cc5 ... G_8864.jpg
8865 is power supply wires http://i1215.photobucket.com/albums/cc5 ... G_8865.jpg
8853 http://i1215.photobucket.com/albums/cc5 ... 853b-1.jpg (air cleaner detail),
8854 http://i1215.photobucket.com/albums/cc5 ... G_8854.jpg,
8858 http://i1215.photobucket.com/albums/cc5 ... G_8858.jpg,
8859 http://i1215.photobucket.com/albums/cc5 ... G_8859.jpg,

For 8860 and 8868 general info, just ammend the file extension to 8868.jpg

Hope this has helped you out heaps
 
Installed this carb last night, using the Spark Valve connection high up on the driver's side. Large bore vacuum connection... Out of the box, this is a quantum leap over the 1100. I have to fabricate a new throttle linkage, as the geometry is not exactly correct. Pretty happy with this so far.
 
Fabricated the linkage. I'm very, very happy with the way this carburetor changed the driveability of the car. Idle is better, acceleration is better, top end is better, adjustability is better. No stalling, no hesitating, no surging.

Anyone want to buy an Pony Carbs Vaporizer 1100?
 
Back
Top